COA Maintenance
Initial (Main Search) Screen
-
SignOn to the BackOffice.
-
From the Item Pricing / Data Management menu, select Chart of Accounts Maintenance.
-
An initial search screen (like the one shown below) should appear:
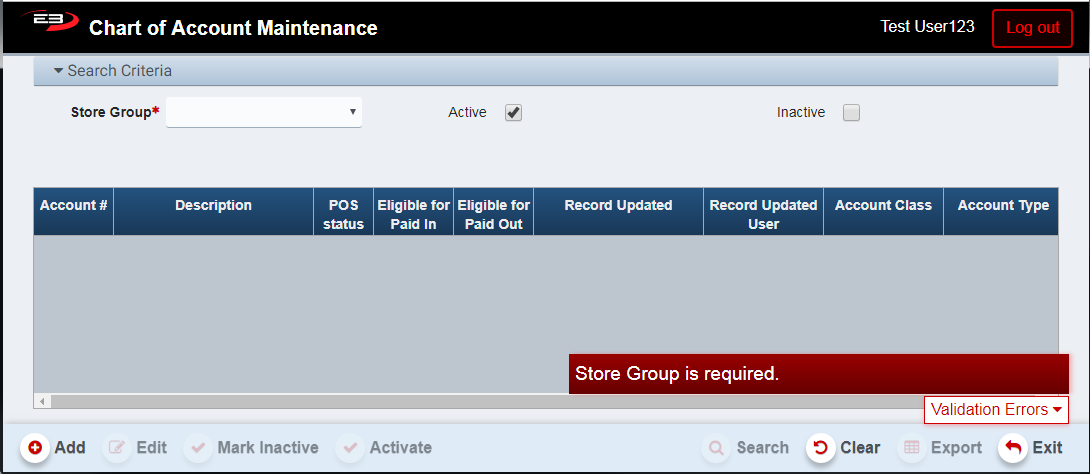
Screenshot of the COA Maintenance application.
-
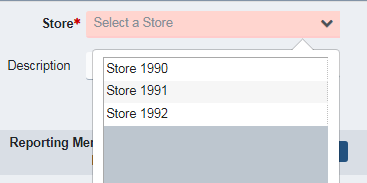
Select a store group from the list of groups visible to you, there is no default store group.
-
If the user has visibility to the All Stores group, the seeded accounts can be viewed and modified.
Screenshot of the COA Maintenance application.
-
Check the Active option to see all active accounts, this is the default setting.
-
Check the Inactive option to see all inactive accounts.
-
The Active and Inactive options may be checked to see both active and inactive accounts
-
Click Search to see the results.

Screenshot of the COA Maintenance application.
Results Grid
The results of a Chart of Accounts search are displayed in a grid.
-
Account # - this is the internal number associated with the account.
-
Description - this is the text description of the account.
-
POS Status - this is the status of the account, ‘A’ means active and ‘I’ means inactive.
-
Eligible for Paid In - if checked, the account is eligible for use in Paid In transactions.
-
Eligible for Paid Out - if checked, the account is eligible for use in Paid Out transactions.
-
Record Updated - this is the date/time the record was last updated.
-
Record Updated User - this is the user ID of the operator that updated the record.
-
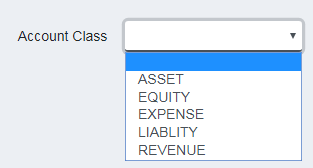
Account Class - the account class is selected from the following control when adding or editing:
Screenshot of the COA Maintenance application.
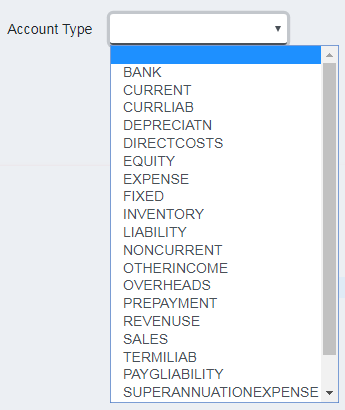
- Account Type - the account type is selected from the following control when adding or editing:
Screenshot of the COA Maintenance application.
Adding An Account
To add an account, click the Add button on the main screen, the Add Chart of Account screen appears:

Screenshot of the COA Maintenance application.
-
The Account Number is a required field and must be unique, it may range from 1 to 9999.
-
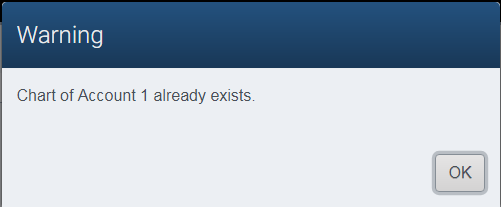
If you enter an account number that’s already in use, when saving the account you get an error:
Screenshot of the COA Maintenance application.
-
When the account has been saved, the Account Number field is no longer visible and can’t be changed.
-
The Description field is also required, is alphanumeric, and must be at least 3 characters long.
-
Check the Eligible for Paid In option to make the account work with the Paid In function on the register.
-
Check the Eligible for Paid Out option to make the account work with the Paid Out function on the register.
-
Select the Account Class and Account Type values from their respective drop-lists.
-
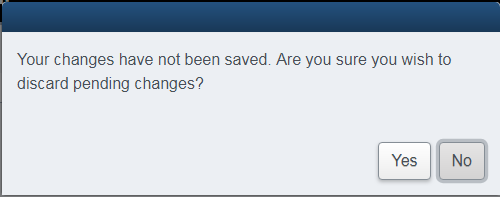
If you click Cancel, you will be prompted to confirm you wish to discard pending changes.
Screenshot of the COA Maintenance application.
-
Click No to return to the add screen.
-
Click Yes to discard changes and return to the search screen.
-
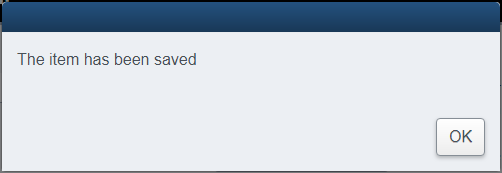
Click Save to save the changes and create the new account record.
Screenshot of the COA Maintenance application.
-
A dialog appears indicating the save was successful, click OK to dismiss.
-
The application returns to the main search screen.
Editing An Account
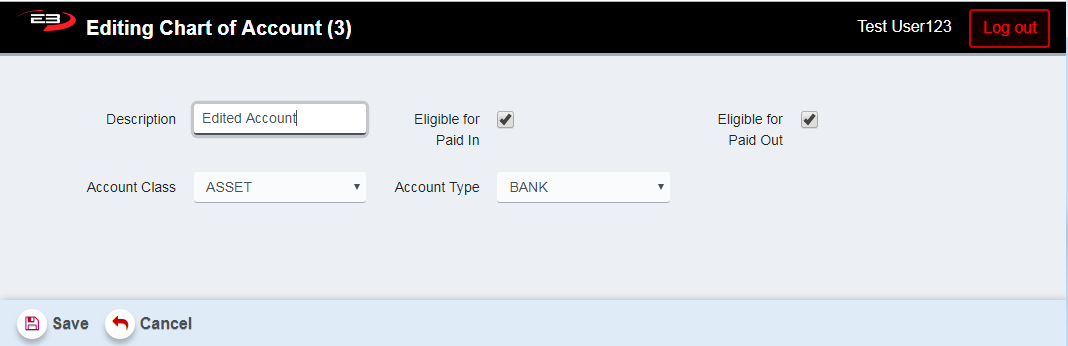
To edit an existing account, search for the account, click on the account record to highlight it and then click Edit. The editing screen appears.
Screenshot of the COA Maintenance application.
-
The Account # is not editable, but it is shown in the title bar of the edit screen.
-
Modify the Description as desired, it must be at least 3 characters long.
-
Check or clear the Eligible for Paid In option as desired.
-
Check or clear the Eligible for Paid Out option as desired.
-
If you click Cancel, you will be prompted to confirm you wish to discard pending changes.
Screenshot of the COA Maintenance application.
-
Click No to return to the edit screen.
-
Click Yes to discard changes and return to the search screen.
-
Click Save to save the changes and create the new account record.
Screenshot of the COA Maintenance application.
-
A dialog appears indicating the save was successful, click OK to dismiss.
-
The application returns to the main search screen.
Mark Inactive and Activate
Accounts may be deactivated and activated as needed.
To Deactivate an active account, do the following:
-
Make sure the Active and Inactive options are checked in the search criteria.
-
Click Search to locate the account.
-
Click on the account in the search results.
-
Click Mark Inactive.
-
The application returns to the search results, you should see ‘I’ in the POS status field indicating inactive.
To Activate an inactive account, do the following:
-
Make sure the Active and Inactive options are checked in the search criteria.
-
Click Search to locate the account.
-
Click on the account in the search results.
-
Click Activate.
-
The application returns to the search results, you should see ‘A’ in the POS status field indicating active.
Other Commands
Export
The Export function allows the user to save the search results as a comma-separated values (CSV) file for use in Excel. Once you have a result set that’s filtered as desired, click the Export button. The file is saved as ChartOfAccount_yyyy-m-d.csv in the default location, typically the Downloads folder for the user.