Enterprise Customer Maintenance
Initial (Main Search) Screen
-
SignOn to the BackOffice.
-
From the Customer Management / Reports menu, select Enterprise Customer Maintenance.
Individual Customer Search
-
An initial search screen (like the one shown below) should appear like this (for Individual customers):
-
Use the Customer Type dropdown menu to select the customer type (Individual or Business), default is Individual.
-
For an individual customer, either the first two characters of the first and last names, or a phone number is required to perform a search (hence the validation error on the bottom right showing in the screen shot).
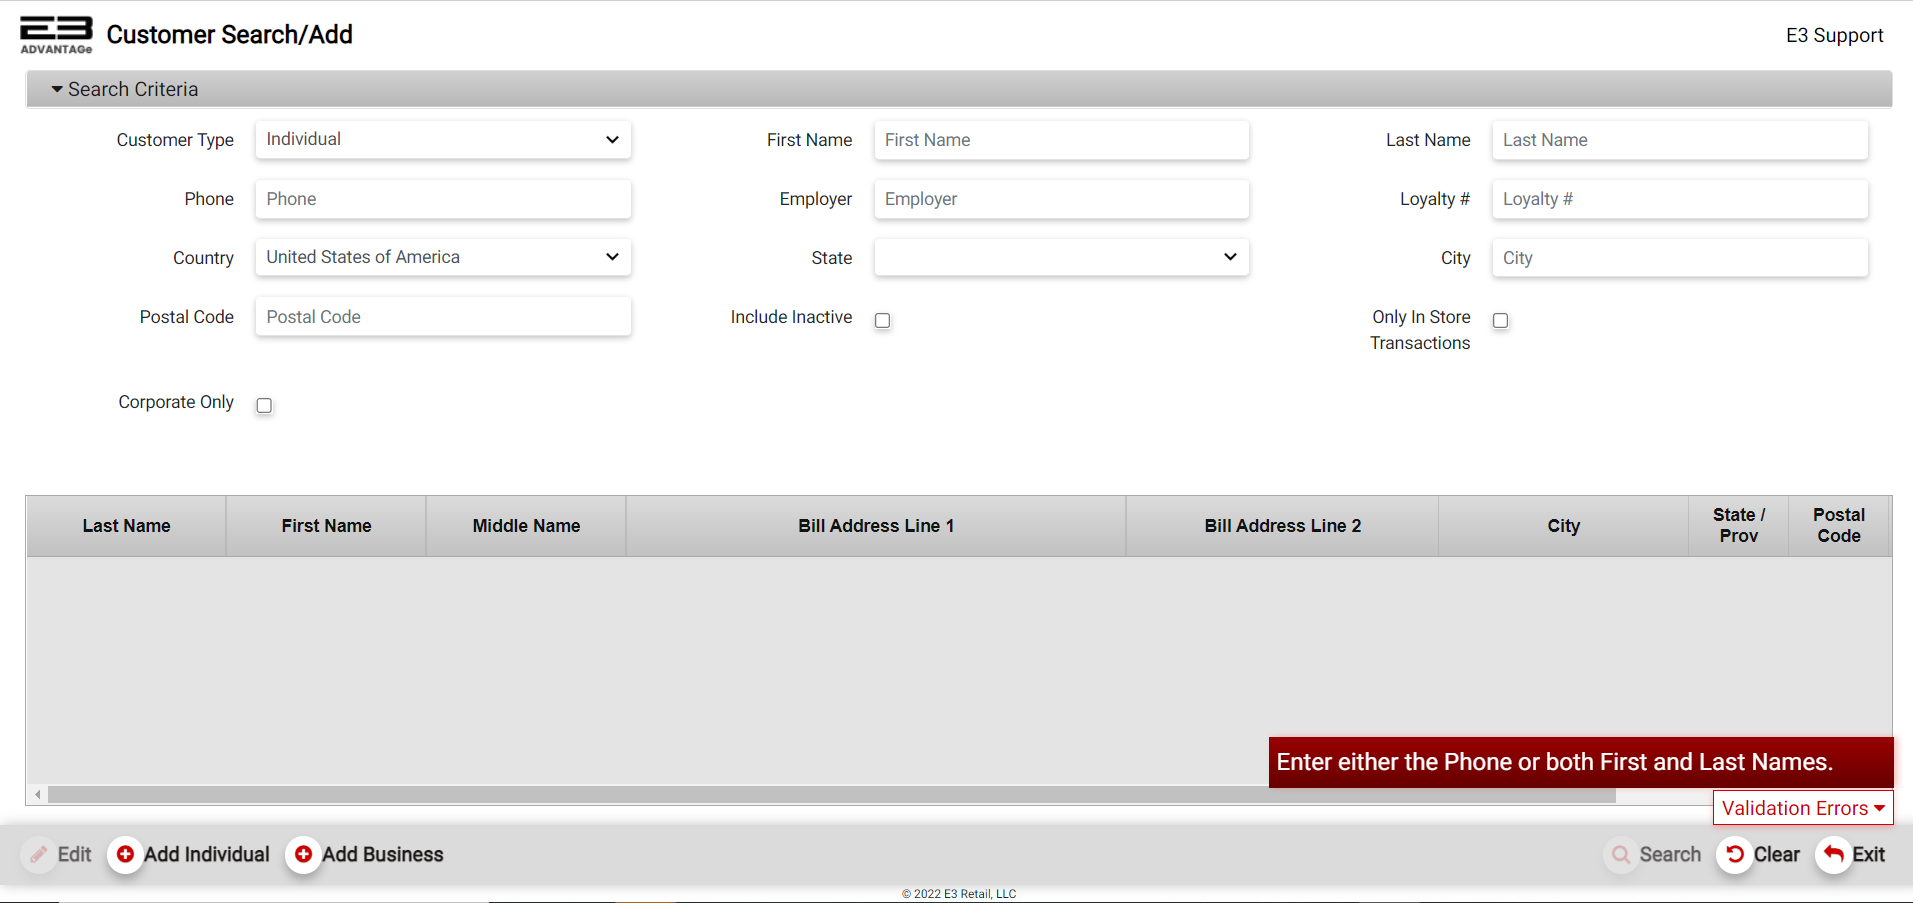
Screenshot of the Enterprise Customer Maintenance application.
-
Enter the first two characters of the customer’s First Name and Last Name to search by name.
-
Enter a customer’s phone number in the Phone field to search by phone number.
-
Searching by phone number matches any number in the customer’s record: Home, Cell, or Business.
-
Enter a customer’s Employer in the employer field to further filter the results.
-
The Loyalty # filters on the generated loyalty number for a customer.
-
The Country may be used to filter the results, it defaults to the United States of America.
-
Select a State from the dropdown menu to filter the results, there is no default State.
-
Enter a name in the City field to filter the results, there is no default City.
-
Enter a valid code in the Postal Code field to filter the results, there is no default Postal Code.
-
Check the Include Inactive option to include customers that have no recent activity.
-
Check the Only In Store Transactions option to limit customers to those with retail activity in the store(s).
-
Check the Corporate Only option to limit customers to those that are Corporate customers.
-
Click Search to see the results as shown here:

Screenshot of the Search Results - Enterprise Customer Maintenance application.
Business Customer Search
- When Business is selected as the Customer Type, the search screen looks like this:
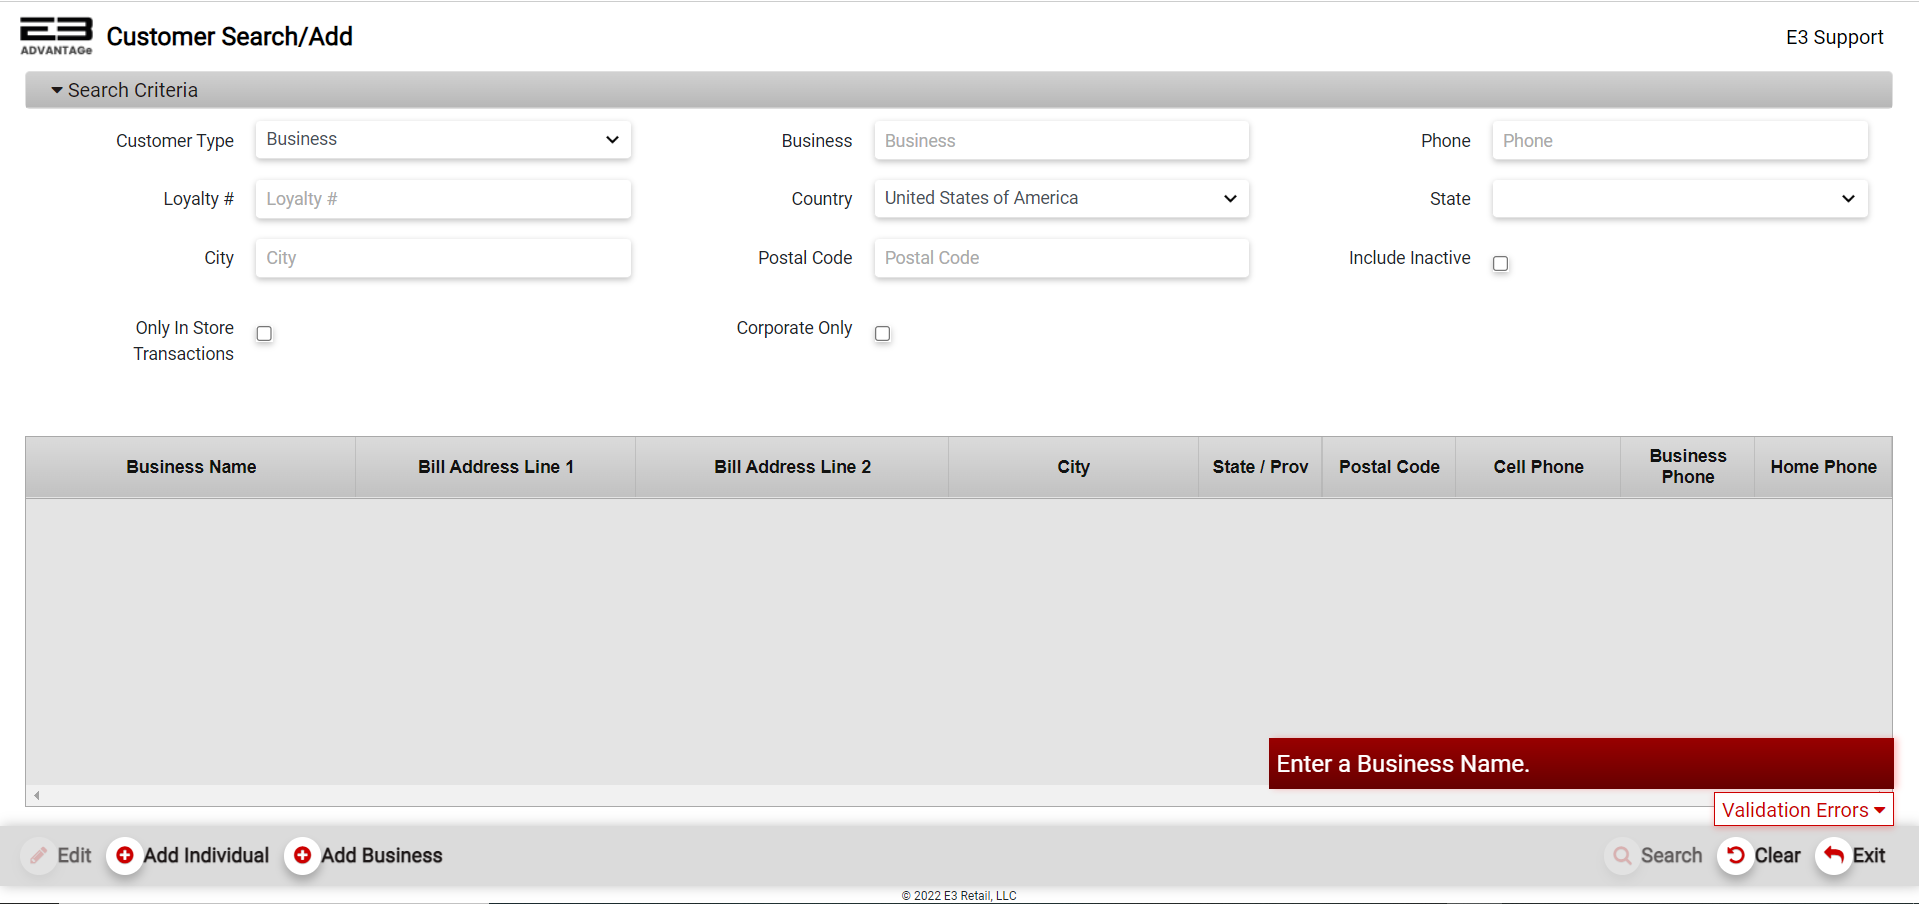
Screenshot of the Enterprise Customer Maintenance application.
-
Enter the first two characters of the Business name to search by the business name.
-
The Phone criteria can filter the results based on phone number.
-
The Loyalty # is filters on the generated loyalty number for a customer.
-
The Country may be used to filter the results, it defaults to the United States of America.
-
Select a State from the dropdown menu to filter the results, there is no default State.
-
Enter a name in the City field to filter the results, there is no default City.
-
Enter a valid code in the Postal Code field to filter the results, there is no default Postal Code.
-
Check the Include Inactive option to include customers that have no recent activity.
-
Check the Only In Store Transactions option to limit customers to those with retail activity in the store(s).
-
Check the Corporate Only option to limit customers to those that are Corporate customers.
-
Click Search to see the results as shown here:

Screenshot of the Search Results - Enterprise Customer Maintenance application.
Results Grid
The results for Individual and Business customer searches are nearly identical.
For Individual customers, the name columns are:
-
Last Name - the customer’s last name
-
First Name - the customer’s first name
-
Middle Name - the customer’s middle name or initial
For Business customers, the name column is:
- Business Name - the name of the business
The remaining columns are common to both Individual and Business customers:
-
Bill Address Line 1 - billing address, line 1
-
Bill Address Line 2 - billing address, line 2
-
City - billing city
-
State / Prov - billing state or province
-
Postal Code - billing postal code
-
Cell Phone - cell phone number associated with the customer
-
Business Phone - business phone number associated with the customer
-
Home Phone - home phone number associated with the customer
Add/Edit Individual Customer
Add Individual Customer
-
To add an Individual customer, click the Add Individual button (bottom left).
-
You should see the Creating New Customer screen that looks like this:
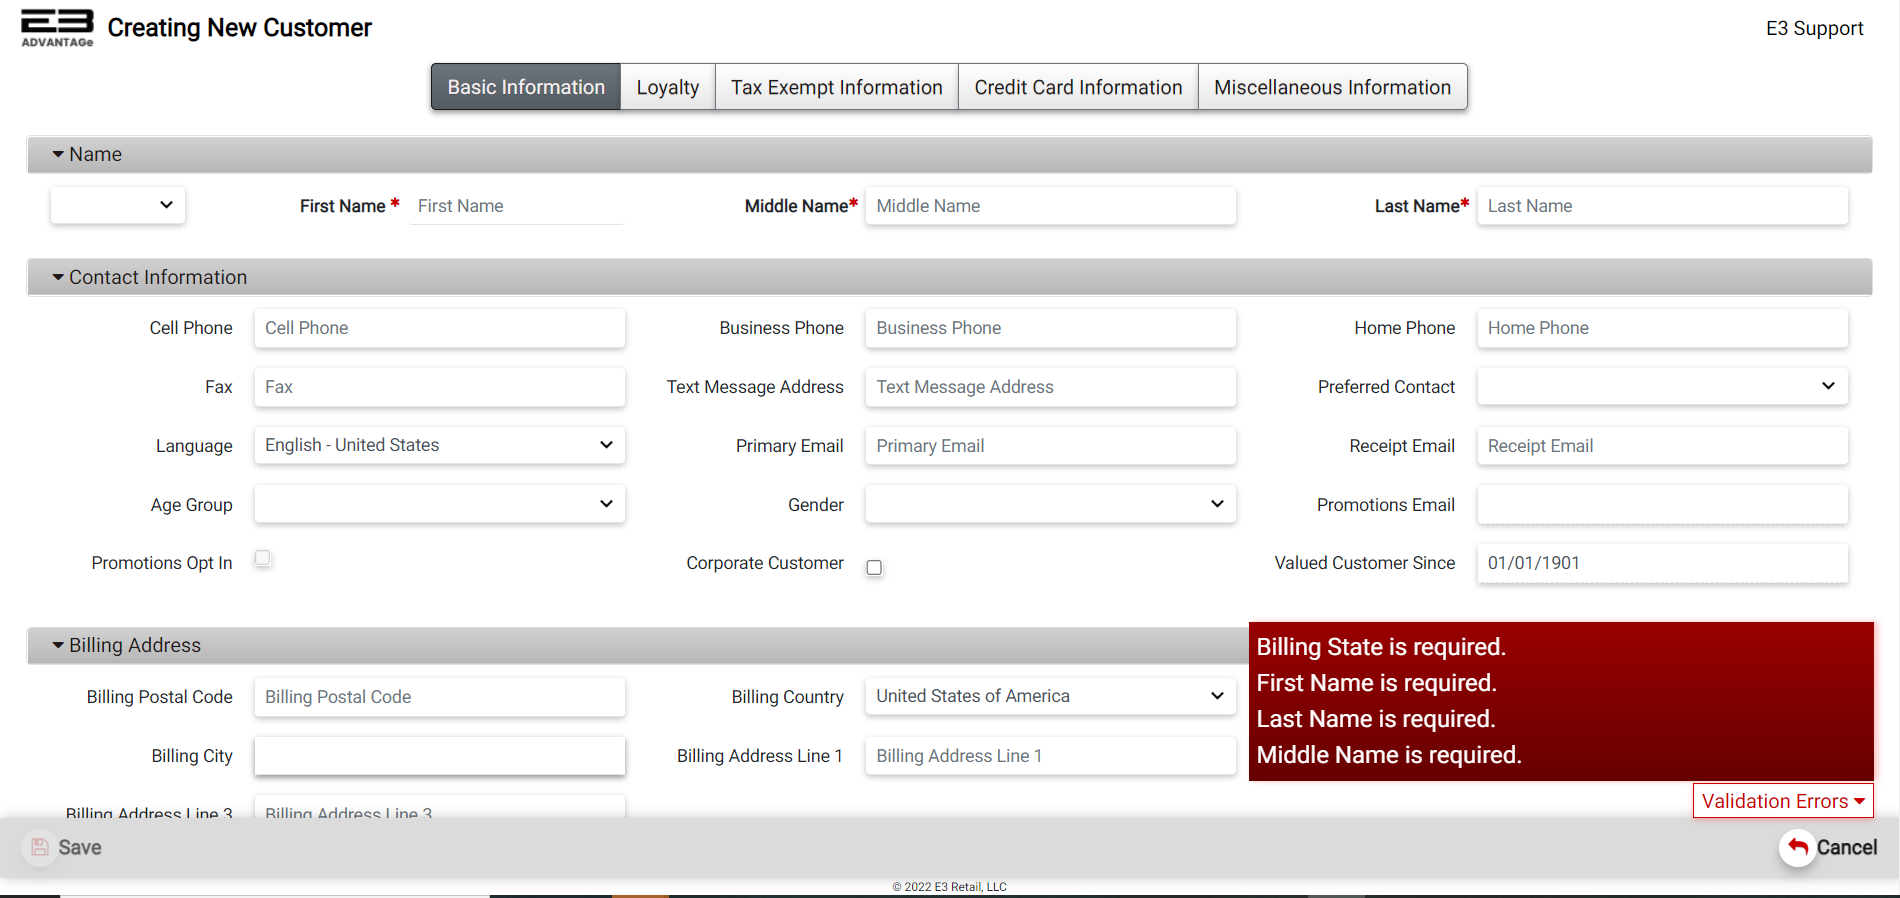
Screenshot of the Add Customer Screen - Enterprise Customer Maintenance application.
-
Required fields are First Name, Middle Name, Last Name, and Billing State and will be marked with a red *.
-
All other fields are optional for adding an Individual customer.
-
See Common Tabs for entering information on the remaining tabs.
-
When you are finished adding the individual customer, click Save to save your new individual customer.
-
Once you click the Save bottom on the bottom left, a customer ID is generated for this new customer.
-
A confirmation dialog indicates the customer has been created successfully, click OK to dismiss.
Edit Individual Customer
-
To edit an Individual customer, enter at least two characters of the first and last names, or one of the phone numbers (if any) assigned to the customer and click Search on the bottom right of the screen.
-
Once you highlight the customer from the search results, the Edit button will be enabled on the bottom left. Click Edit.
-
You should see the Editing screen labelled with the customer name (first and last) and the Customer ID.

Screenshot of the Edit Customer Screen - Enterprise Customer Maintenance application.
-
See Common Tabs section below in this document for entering information on the remaining tabs.
-
When you are finished making changes to the individual customer, click Save to save your changes.
-
A confirmation dialog indicates the customer has been saved successfully, click OK to dismiss.
Delete
The Delete function is used to delete a customer. Note that once this is verified, it can’t be undone.
Add/Edit Business Customer
The process for adding and editing a Business customer is very similar to the Individual customer processes. The main difference is the required fields
Add Business Customer
-
To add a Business customer, click the Add Business button.
-
You should see the Creating New Business Customer screen that looks like this:
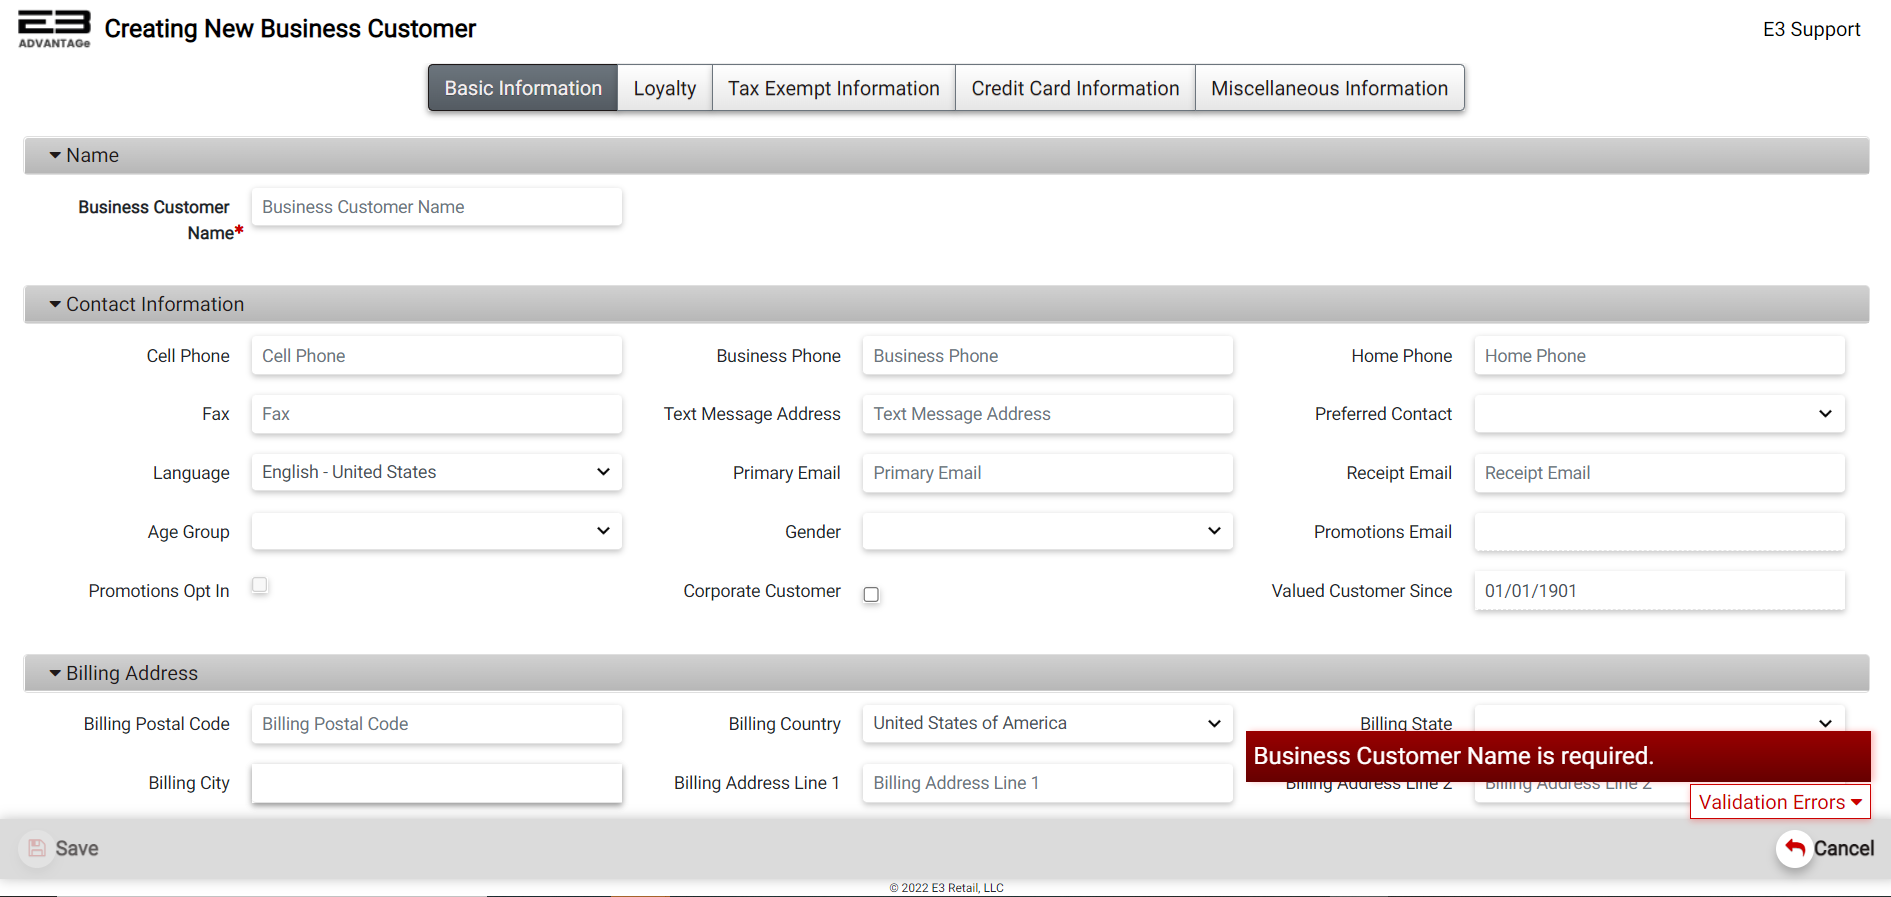
Screenshot of the Add Business Customer Screen - Enterprise Customer Maintenance application.
-
The only required field is the Business Customer Name field.
-
All other fields are optional for adding a Business customer.
-
See Common Tabs section below in this document for entering information on the remaining tabs.
-
When you are finished adding the business customer, click Save, a customer ID is generated for this new customer.
-
A confirmation dialog indicates the customer has been created successfully, click OK to dismiss.
Edit Business Customer
-
To edit a Business customer, set the Customer Type to Business and perform a search using at least two characters of the Business name.
-
Once you highlight the customer from the search results, the Edit button will be enabled on the bottom left. Click Edit.
-
You should see the Editing screen labelled with the Business name and the Customer ID.
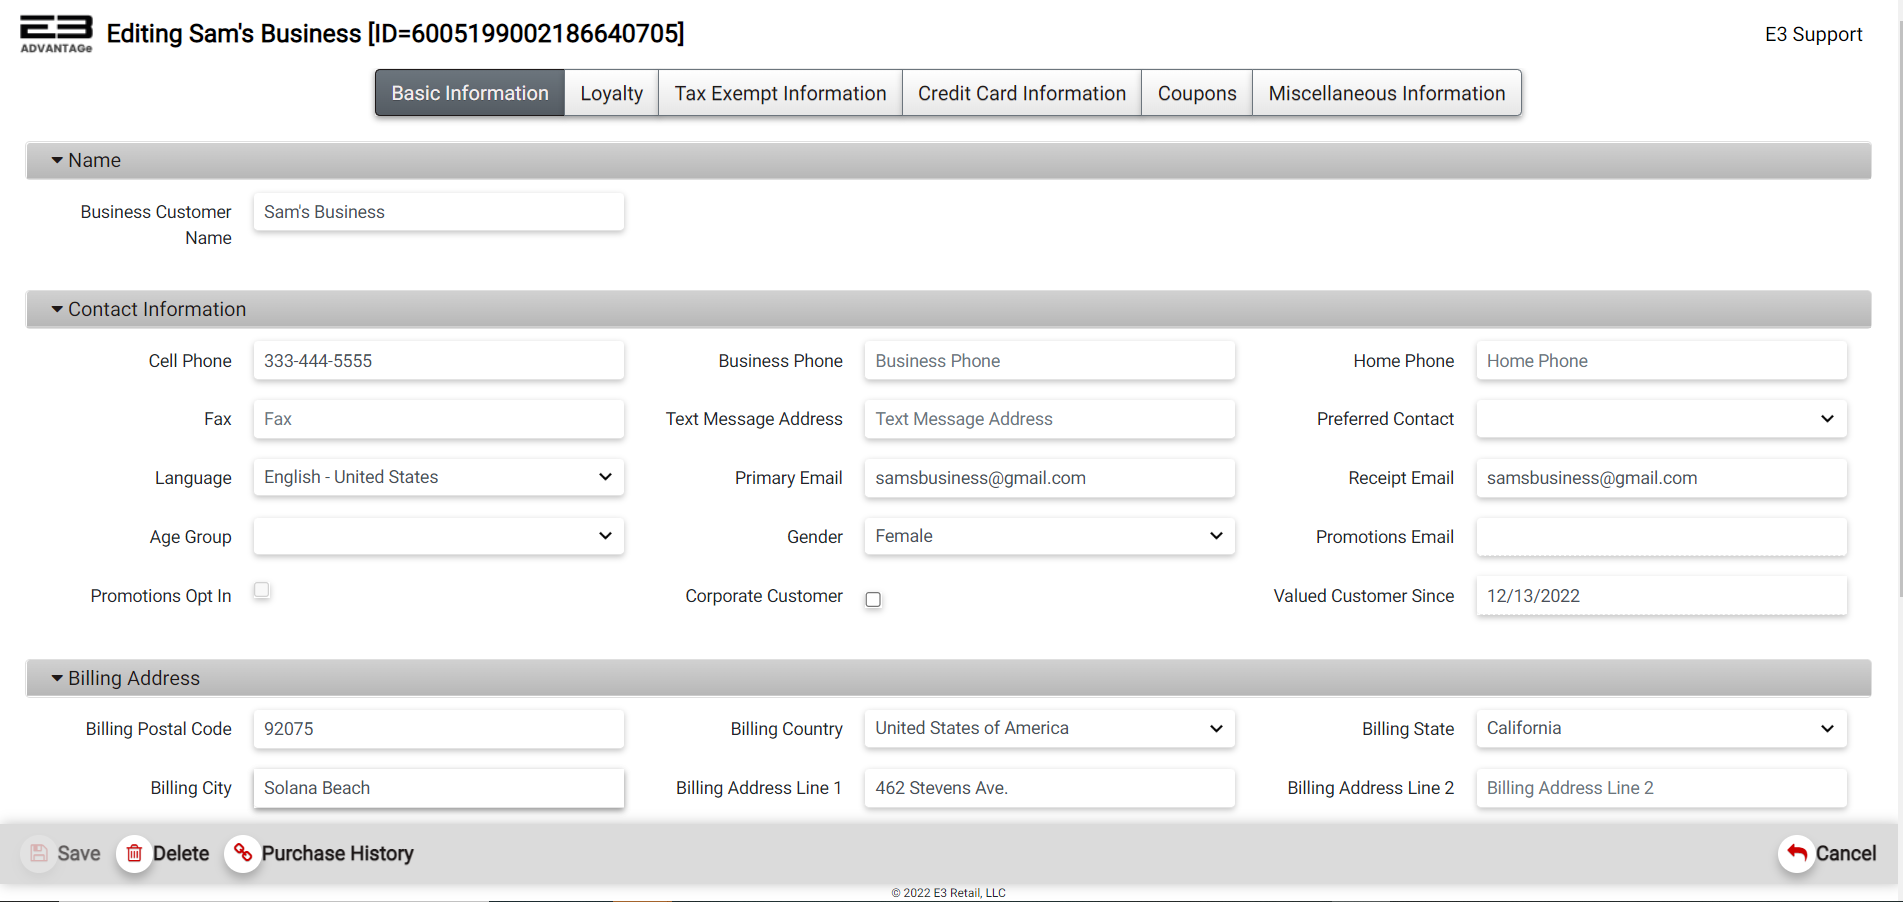
Screenshot of the Edit Business Customer Screen - Enterprise Customer Maintenance application.
-
The Business Customer Name field contains the business name.
-
Remaining fields on the Basic Information are common to Individual and Business customers.
-
See Common Tabs for entering information on the remaining tabs.
-
When you are finished making changes to the business customer, click Save to save your changes.
Delete
The Delete function is used to delete a customer. Note that once this is verified, it can’t be undone.
Common Tabs
When adding and/or editing customer data. there are several tabs that appear on the top section of the screen - Basic Information, Loyalty, . . etc. that are common to both Individual and Business Customers. Read the following section for more details.
Basic Information
Aside from the Name section of the Basic Information tab which is different for Individual and Business customers, the remaining three sections are generally common between Individual and Business customers. Differences are noted.
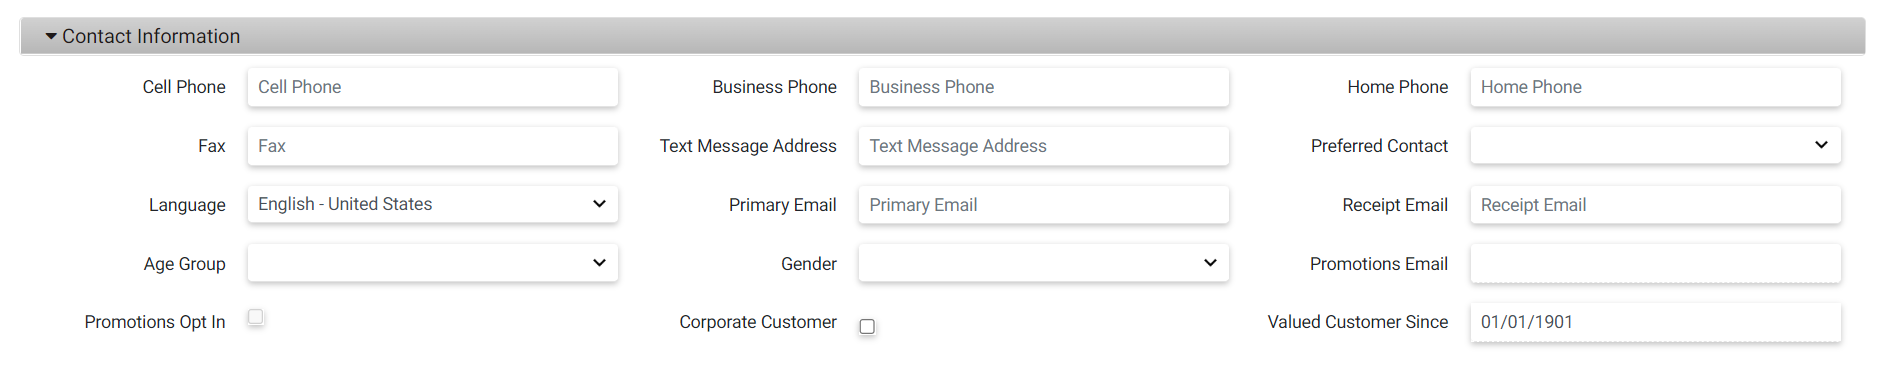
Contact Information Section
The Contact Information section is used to store information that can be used to contact a customer. At present, the Promotions Email and Promotions Opt In settings are disabled and can’t be modified.
Screenshot of the Contact Information Section -Enterprise Customer Maintenance application.
-
The Cell Phone field holds the customer’s mobile phone number, format is xxx-xxx-xxxx (digits only).
-
The Business Phone field holds the customer’s business phone number, format is xxx-xxx-xxxx (digits only).
-
The Home Phone field holds the customer’s home (landline) phone number, format is xxx-xxx-xxxx (digits only).
-
The Fax field holds the customer’s fax phone number, format is xxx-xxx-xxxx (digits only).
-
The Text Message Address field holds the customer’s preferred contact info for text messages (SMS).
-
The Preferred Contact dropdown menu selects the customer’s preferred method of contact, if any.
-
The Language dropdown menu selects the customer’s language, only English - United States is supported at present.
-
The Primary Email field holds the customer’s email address, the format is [user]@[site].[extension]
-
The Receipt Email field holds the customer’s preferred email address for receiving receipts, the format is [user]@[site].[extension]
-
The Age Group dropdown menu is used to select an age group, this selection is optional
-
The Gender dropdown menu is used to select a gender, this selection is optional
-
The Promotions Email holds the customer’s email for sending promotions if the Promotions Opt In flag is set.
-
The Promotions Opt In field, when checked, specifies the customer wishes to receive promotional material.
-
The Corporate Customer option, when checked, indicates the customer is visible at the corporate level.
-
The Valued Customer Since field indicates the date when the customer was added. This field is alway disabled. It defaults to 01/01/1901 when creating a customer but updates once the customer is saved in the system.
Billing Address Section
The Billing Address section holds information for mailing bills and other related items to the customer.

Screenshot of the Billing Address Section - Enterprise Customer Maintenance application.
-
The Billing Postal Code field holds the postal (zip) code to where billings will be sent.
-
The Billing Postal Code format can be 5 digits, 9 digits, or 5-4 digits (e.g. 12345-2345).
-
When the Billing Postal Code is set, the following fields are auto filled - Billing Country, Billing State, and Billing City.
-
Billing Country is selected from a dropdown menu, currently United States of America and Canada are supported.
-
If the Billing Country is United States of America, the Billing State dropdown menu contains American state names.
-
If the Billing Country is Canada, the Billing State dropdown menu contains Canadian provinces.
-
The Billing State is a required field for Individual customers.
-
The Billing City is any valid city name.
-
Billing Address Line 1 is typically a street address or Post Office box (e.g. PO Box 7240417).
-
Billing Address Line 2 can be an apartment or suite number number.
-
Billing Address Line 3 can be an individual office or a C/O (in care of) designation.
Shipping Address Section
The Shipping Address section holds information for shipping packages to the customer.

Screenshot of the Shipping Address Section - Enterprise Customer Maintenance application.
-
If the Ship To Billing Address option is selected, all the fields for the Shipping Address are automatically set.
-
If the Ship To Billing Address option is set and then cleared, fields in the Shipping Address section remain set.
-
The Shipping Postal Code field holds the postal (zip) code to where items will be shipped.
-
The Shipping Postal Code format can be 5 digits, 9 digits, or 5-4 digits (e.g. 12345-2345).
-
When the Shipping Postal Code is set; Shipping Country, Shipping State, and Shipping City are also set.
-
Shipping Country is selected from a dropdown menu, currently United States of America and Canada are supported.
-
If the Shipping Country is United States of America, the Shipping State dropdown menu contains American state names.
-
If the Shipping Country is Canada, the Shipping State dropdown menu contains Canadian provinces.
-
The Shipping City is any valid city name.
-
Shipping Address Line 1 is typically a street address or Post Office box (e.g. PO Box 7240417).
-
Shipping Address Line 2 can be an apartment or suite number number.
-
Shipping Address Line 3 can be an individual office or a C/O (in care of) designation.
Loyalty
The Loyalty tab allows the user to enter loyalty information for a customer.
-
The Customer Groups dropdown menu is used to select one or more customer groups from the list as shown here:
-
The Comments box holds free-form text for comments, these are saved when the customer is saved.
-
Multiple comments may be added to the comment box, there is no checking of any kind on the comments.
-
When a customer is selected on the register, any comments are displayed in a pop-up window.
Tax Exempt Information
The Tax Exempt Information tab allows the user to enter tax exempt certificate information for a customer.
-
The Tax Exempt Certificate Num field holds the certificate number, this must be between 3 and 24 digits long.
-
Once a Tax Exempt Certificate Num is entered, the Tax Exempt Reason Code drop down box appears.
-
The Tax Exempt Reason Code dropdown menu holds the reason why the customer has a tax-exempt certificate.
-
If a Tax Exempt Certificate Num is entered, the Tax Exempt Reason Code is a required field.
Credit Card Information
The Credit Card Information tab allows the user to attach a credit card on file to the customer’s record. This function is only available when the customer application is run on a register since there are no PIN pad devices connected to a cloud server that could be used to read card information.
-
Only a single card on file is supported for each customer.
-
The following fields are used when putting a credit card on file:
-
Tender Descriptor - card brand, MasterCard for example
-
Account Num - masked card number, last 4 digits are visible
-
Expiration Date - expiration date for the card in MMYY format
-
Billing Zip - the billing zip code for the card (required for handkey)
-
Name On Card - the masked name on the credit card, first characters are visible
-
-
There are two buttons on the Credit Card Information tab that are used to add and delete credit cards on file.
Add Credit Card
- Click the Add Credit Card button to place a credit card on file for a customer.
Screenshot of the Add Credit Card button - Enterprise Customer Maintenance application.
- The following prompt appears to start the process to place a customer’s credit card on file:
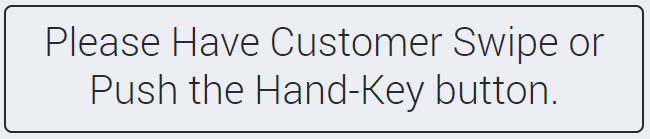
Screenshot of the Add Credit Card prompt - Enterprise Customer Maintenance application.
- If the customer swipes the card at the PIN pad, the results will look like this:
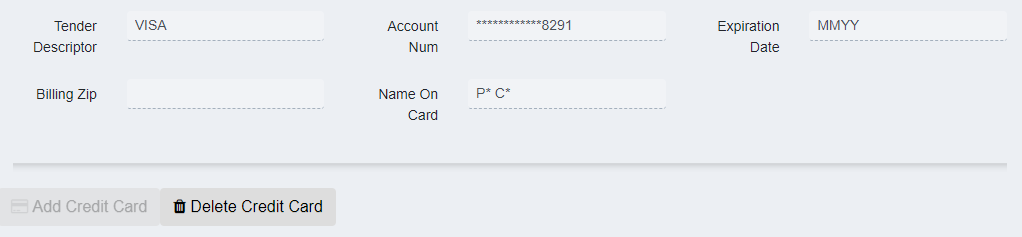
Screenshot of the Credit Card Information Tab - Enterprise Customer Maintenance application.
- If the Hand Key option is selected by clicking the Hand Key button, the following prompt appears:
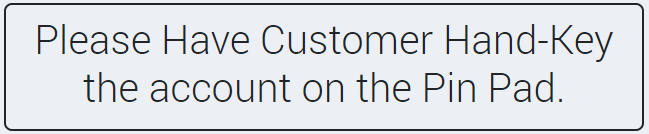
Screenshot of the Add Credit Card prompt - Enterprise Customer Maintenance application.
-
The customer must then enter the following fields on the PIN pad:
-
Card number
-
Expiration date in MMYY format
-
CVV (the number next to the signature on the back of the credit card)
-
-
Following the hand-keyed entry of these fields, the results will look like this:
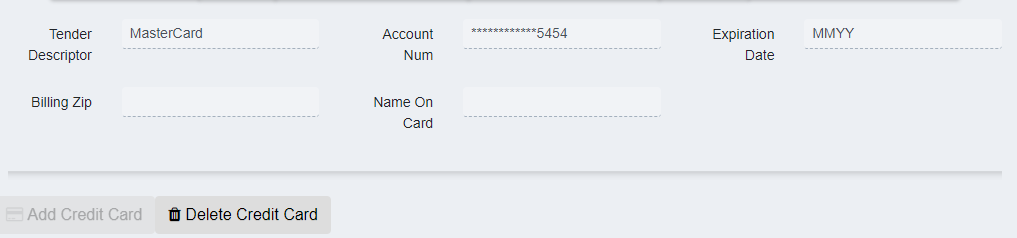
Screenshot of the Credit Card Information Tab - Enterprise Customer Maintenance application.
- The Billing Zip and Name On Card fields are entered by the operator.
Delete Credit Card
-
Click the Delete Credit Card button to remove a customer’s card on file.
-
To update an expired card, delete the old card on file and then add the new card.
Screenshot of the Delete Credit Card button.
Coupons
-
A customer coupon is a discount based on corporate or other membership criteria (e.g. AAA membership).
-
Click the Add Coupon button to begin the process.
-
Check the Include out-of-range option to display coupons that are either expired or not yet active.
-
This takes you to the coupon selection screen.
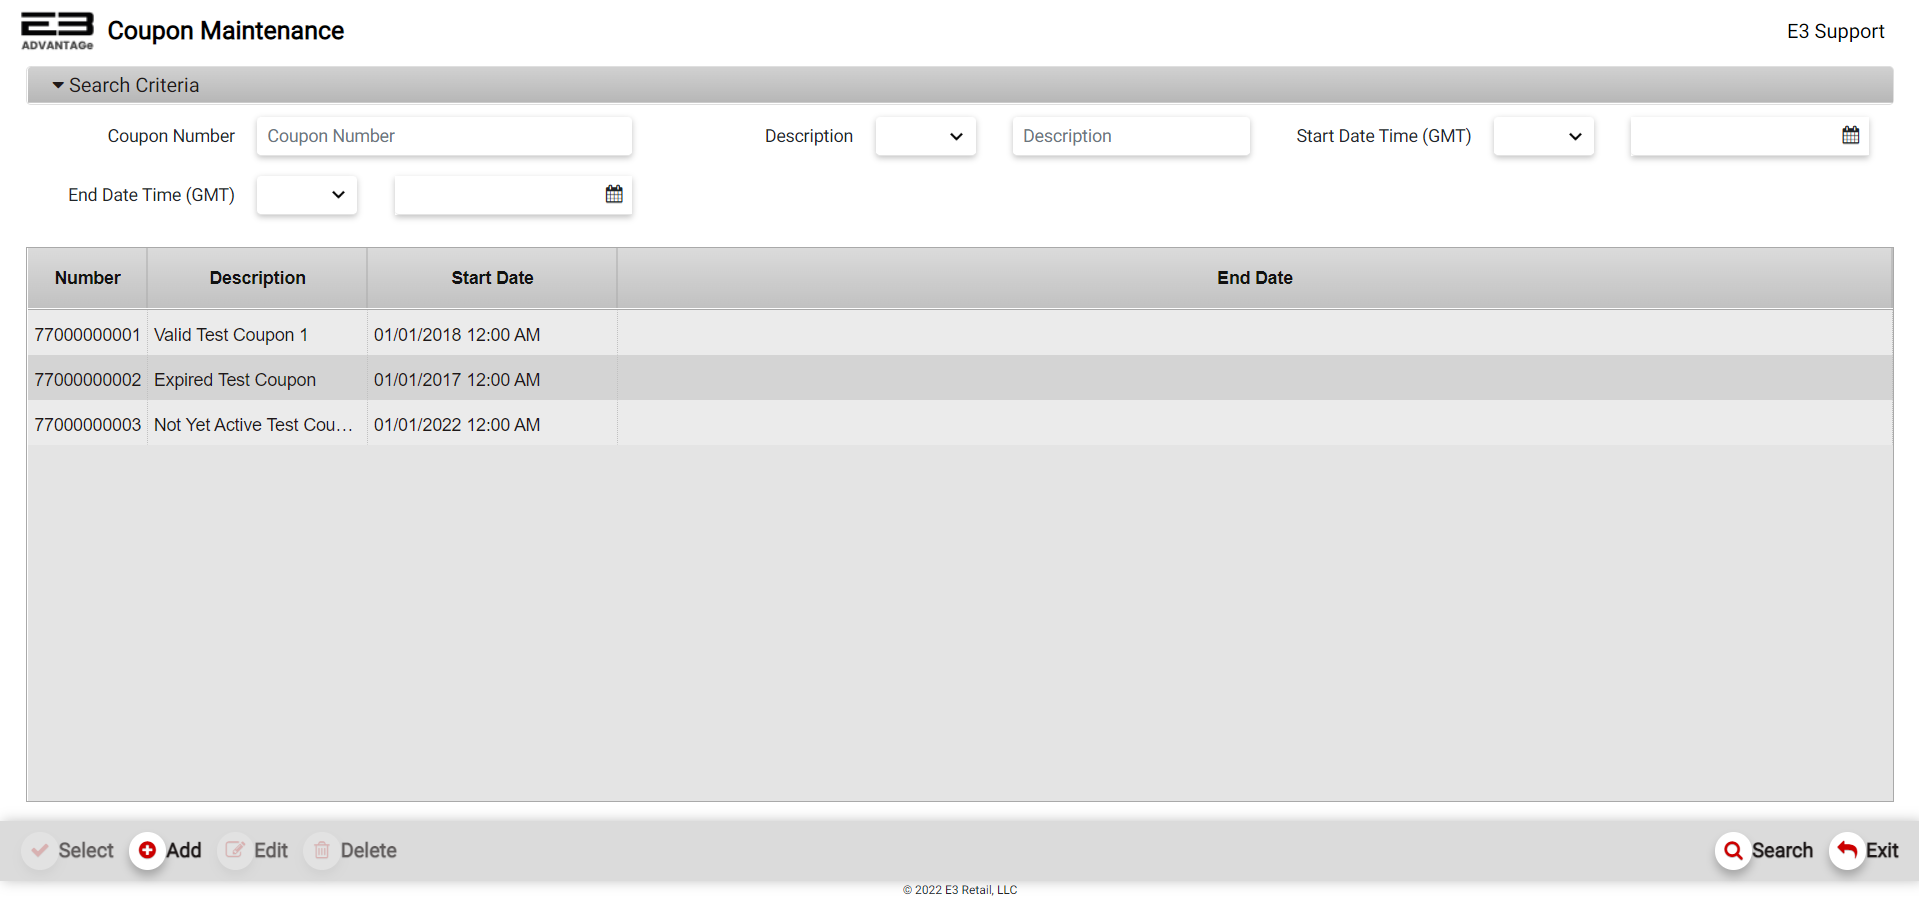
Screenshot of the Coupon Maintenance application.
-
Highlight the desired coupon from the list and then click the Select Coupon button on the bottom left.
-
The coupon is added and the screen returns to the list of coupons attached to this customer.
-
To delete a coupon from the customer, click the trash can icon to the left of the coupon.
-
When prompted to confirm deleting a coupon, click Yes.
The Coupon Tab only shows up on editing a customer. It does not show up on creating a customer.
Miscellaneous Information
The Miscellaneous Information tab, as the name implies, contains information that doesn’t really fit any of other tabs.

Screenshot of the Miscellaneous Information tab - Enterprise Customer Maintenance application.
-
The Customer ID is read-only and is created by the application when the customer is initially added.
-
The Customer Created date is read-only and is set to the date when the customer is initially added.
-
The Customer Last Update is read-only and is automatically changed when the customer is modified.
-
The Active? checkbox is selected by default and can be cleared to make the customer inactive.
-
The Marital Status Code drop list is used to select a marital status, this selection is optional.
-
The Employer field is used to enter the customer’s employer (if any), this is optional.
Other Commands
Export
The Export function allows the user to save the search results as a comma-separated values (CSV) file for use in Excel. Once you have a result set that’s filtered as desired, click the Export button. The file is saved as Customer_yyyy-m-d.csv in the default location, typically the Downloads folder for the user.
Confirm Selection
The Confirm Selection function is used to confirm a customer selected for a transaction (only on a register in edit mode) or to confirm a customer that will be added as a contact for a house account.
Purchase History
The Purchase History function is used to display the customer’s purchase history subject to the search criteria. This command only shows up in edit mode.
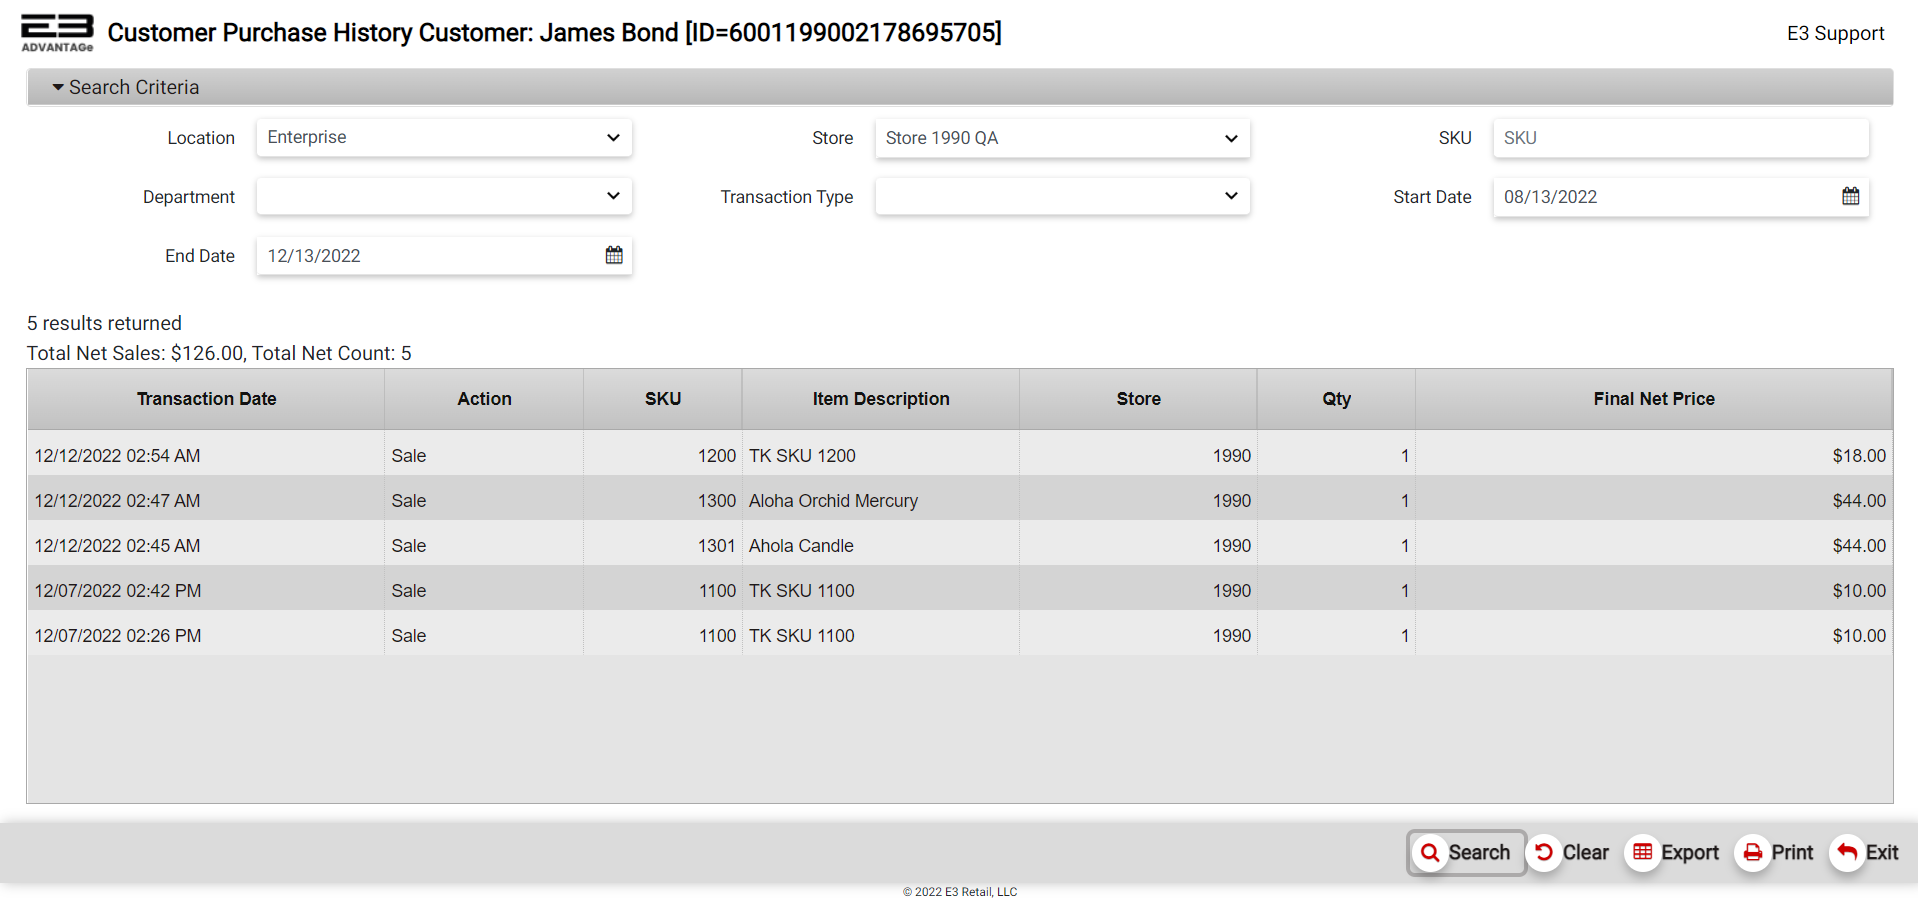
Screenshot of the Customer Purchase History Report.
-
The Location field filters the purchase history of the entire Enterprise or for a Local Store Only.
-
The Store field selects a store number to filter the purchase history for a single store, default is all visible stores.
-
The SKU field filters the purchase results to a single item, default is all items.
-
The Department dropdown menu filters the purchase results to a single department, default is all departments.
-
The Transaction type is currently restricted to Sale only.
-
The Start Date and End Date fields filter on a date range.
-
The default Start Date is today minus four months.
-
The default End Date is today.
-
After setting the desired search criteria, click Search, on the bottom right, to see the purchase history results.
-
Click Clear (bottom right) to clear the search criteria to their default values.
-
Click Exit (bottom right) to return to the main customer page.