Inventory Adjustments
Initial (Main Search) Screen
-
SignOn to the BackOffice.
-
From the Inventory Management / Reports menu, select Inventory Adjustment.
-
An initial search screen (like the one shown below) should appear.
-
This is the same search used for Physical Count.
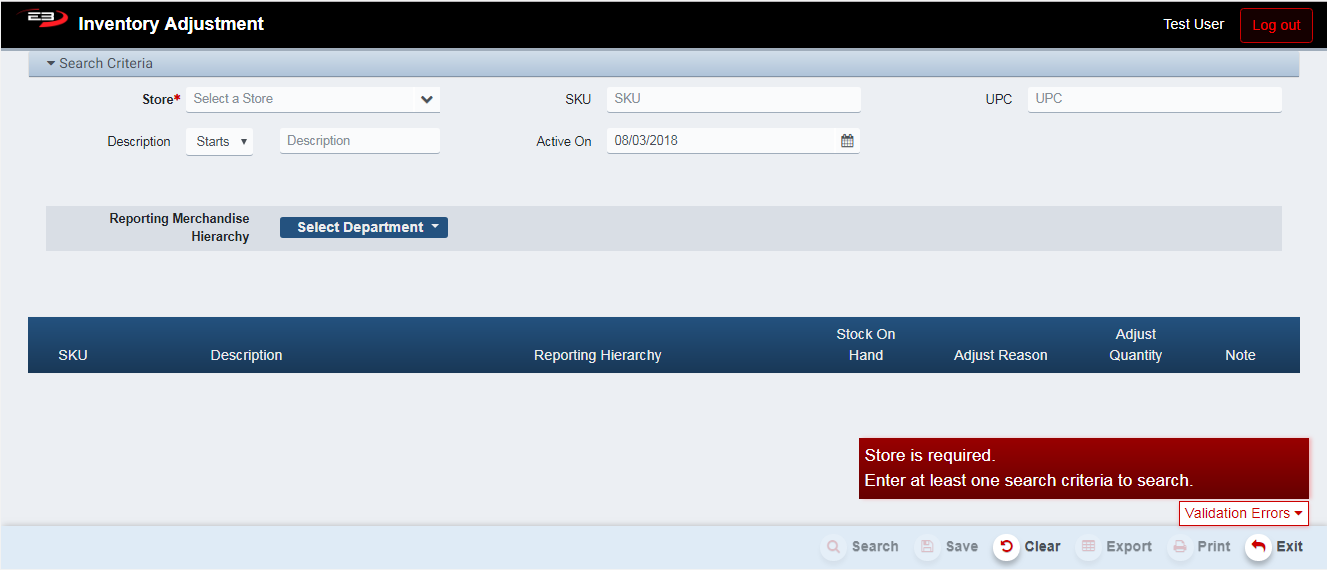
Screenshot of the Inventory Adjustments application.
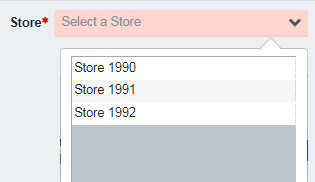
- Select a store from the list of stores visible to you, if only a single store is visible it is selected by default.
Screenshot of the Inventory Adjustments application.
-
Enter at least one other of the following search criteria:
-
SKU
-
UPC
-
Description (and selecting Starts With, Contains, Ends With)
-
Active On (date)
-
Merchandise Hierarchy (any level may be used)
-
Department
-
Department -> Class
-
Department -> Class -> Subclass
-
-
-
Click Search.
-
Verify the search result set, you should see the items filtered according to the search criteria.
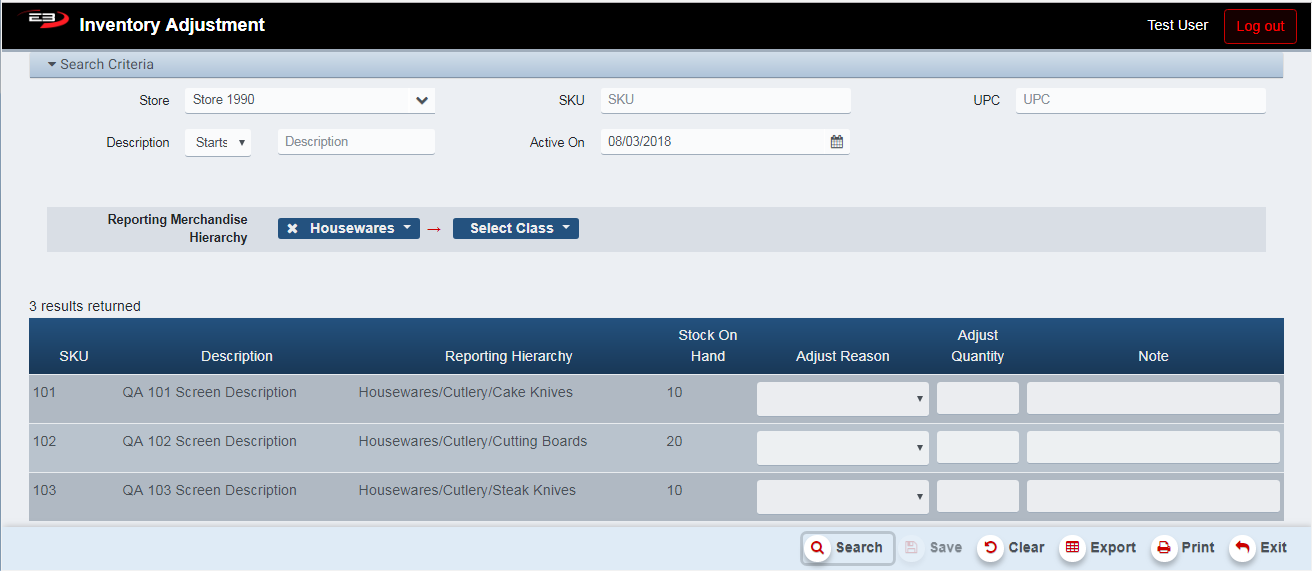
Screenshot of the Inventory Adjustments application.
-
See the next section for how to update and save the inventory adjustments.
-
Click Clear to clear the results and reset the search criteria to their default values.
-
When there are items in the results, the Export and Print buttons are enabled; see section 3.
-
Click Exit to leave the application when complete.
Performing Inventory Adjustments
-
You can adjust the inventory for each item in the search results.
-
For each item whose inventory you are going adjust, perform the following steps:
-
Select an Adjust Reason from the list; Transfer In increases the inventory, all others reduce inventory.
-
Select the Adjust Quantity (add or subtract depends on the Adjust Reason).
-
Optionally enter text in the Note field to further describe the adjustment.
-
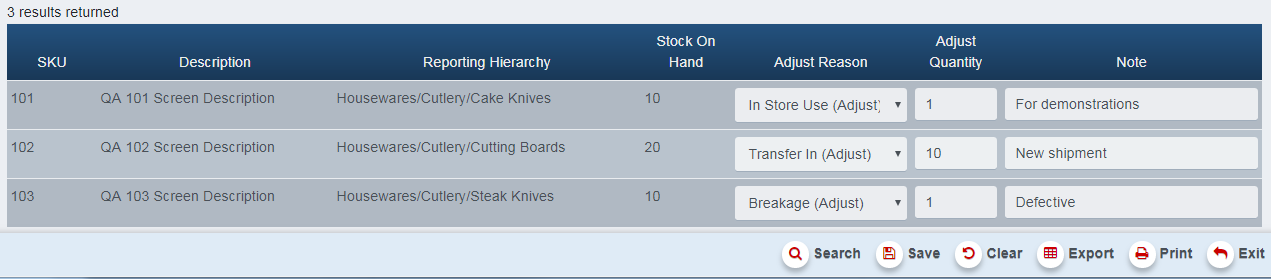
Screenshot of the Inventory Adjustments application.
-
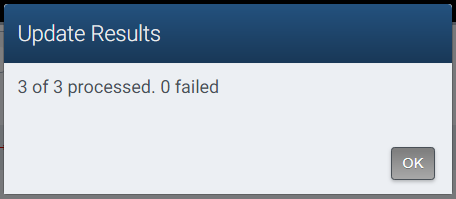
Notice the Save button becomes enabled, click Save to save your changes, answer Yes to confirm the save.
-
A dialog appears when the update is complete, click OK to dismiss.
Screenshot of the Inventory Adjustments application.
- The new Stock On Hand counts are updated in the search results.

Screenshot of the Inventory Adjustments application.
Other Commands
Export
The Export function allows the user to save the report as a comma-separated values (CSV) file for use in Excel. Once you have a result set that’s filtered as desired, click the Export button. The file is saved as InventoryAdjustment_yyyy-m-d.csv in the default location, typically the Downloads folder for the user.
The Print function allows the user to save the report as an Acrobat PDF file for viewing/printing in Adobe Acrobat Reader. Once you have a result set that’s filtered as desired, click the Print button. The file is saved as InventoryAdjustment.pdf in the default location, typically the Downloads folder for the user.