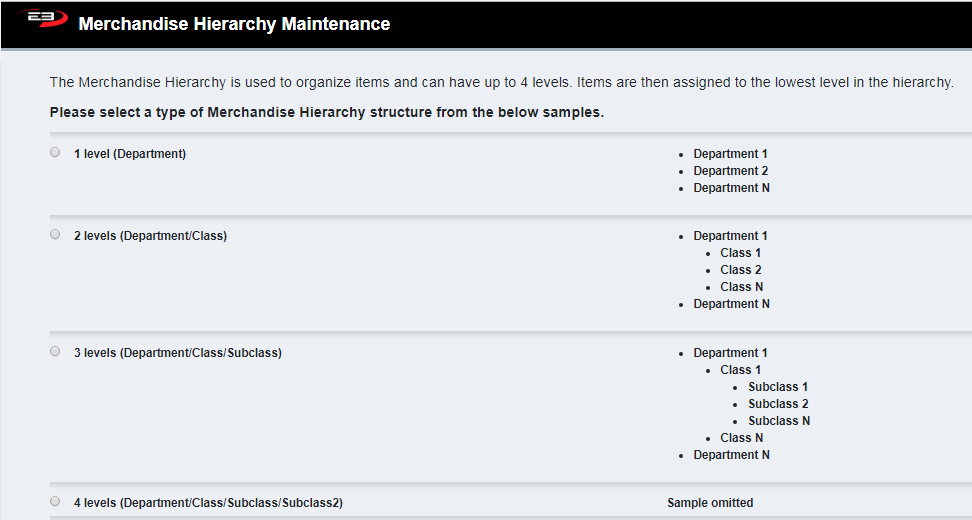
Merchandise Hierarchy Maintenance
Initial Screen
-
SignOn to the Back Office.
-
From the Configuration Management menu, select Merchandise Hierarchy Maintenance.
-
There is no concept of searching in this application, the entire hierarchy is displayed and accessible.
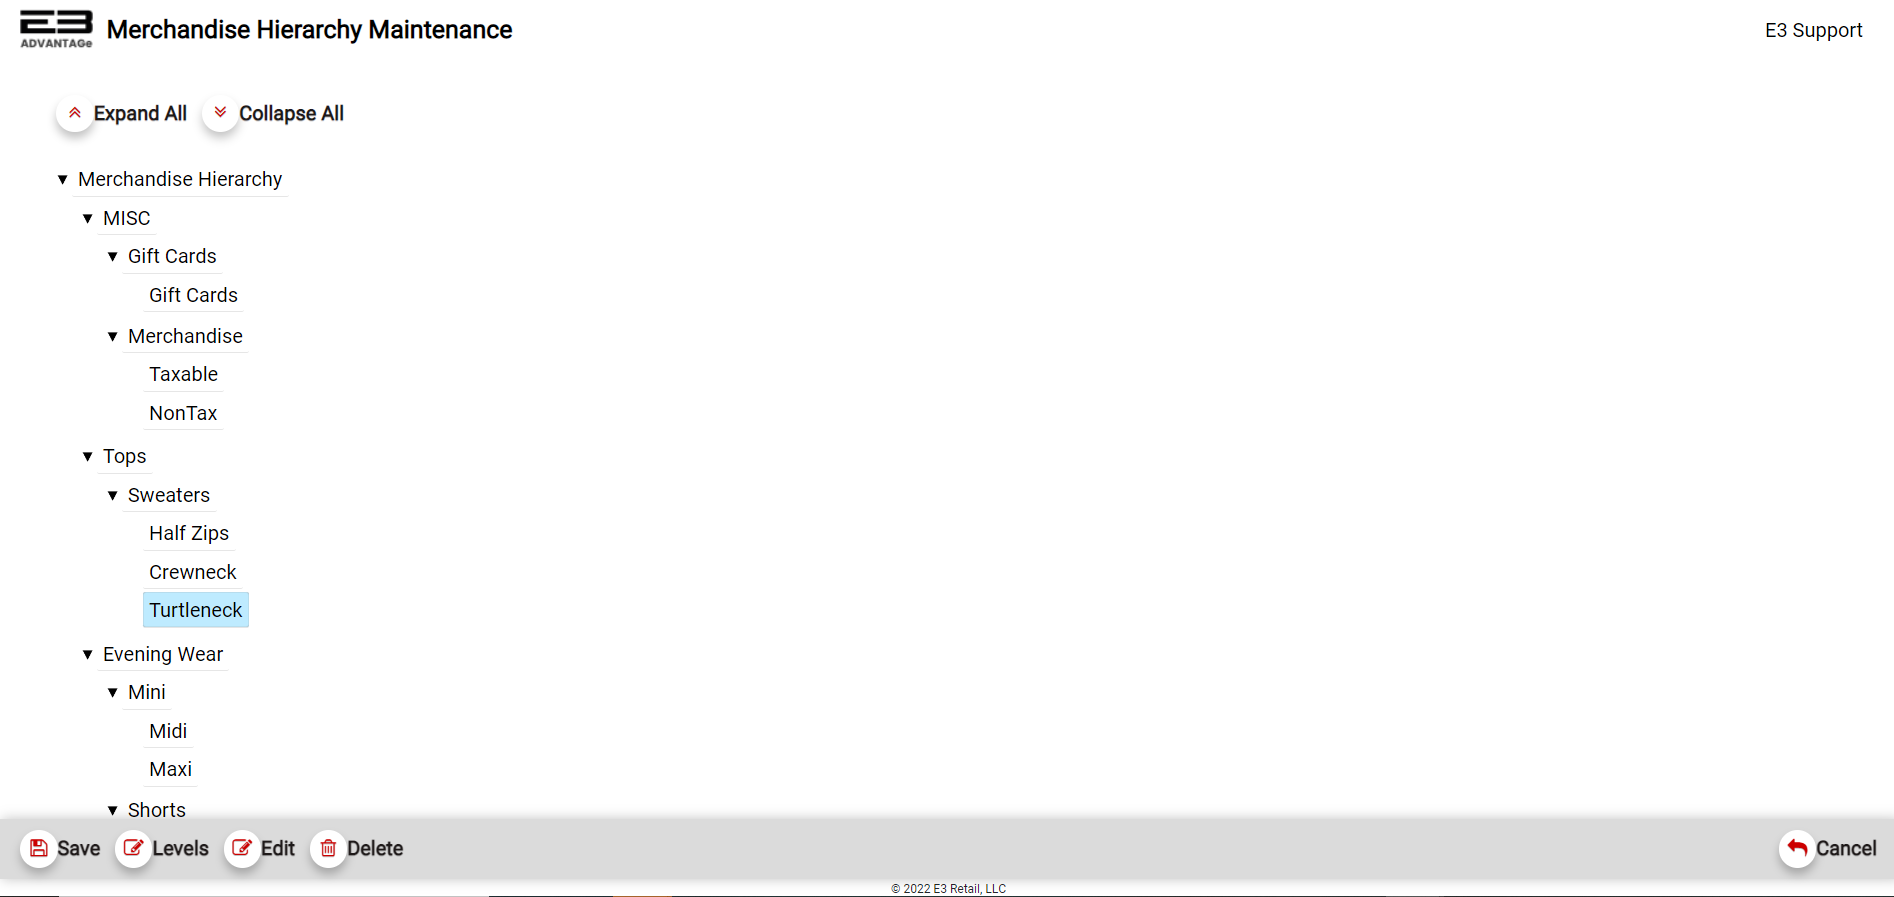
Screenshot of the Merchandise Hierarchy Maintenance application.
- If you click Collapse All, the merchandise hierarchy collapses as seen here:

Screenshot of the Merchandise Hierarchy Maintenance application.
-
Click Expand All to restore the Merchandise Hierarchy to its fully expanded state.
-
You can also click on the arrows next to a node in the hierarchy to close or open the node.
-
Click the Exit button to leave Merchandise Hierarchy Maintenance and return to the menu.
Modifying The MH
Levels
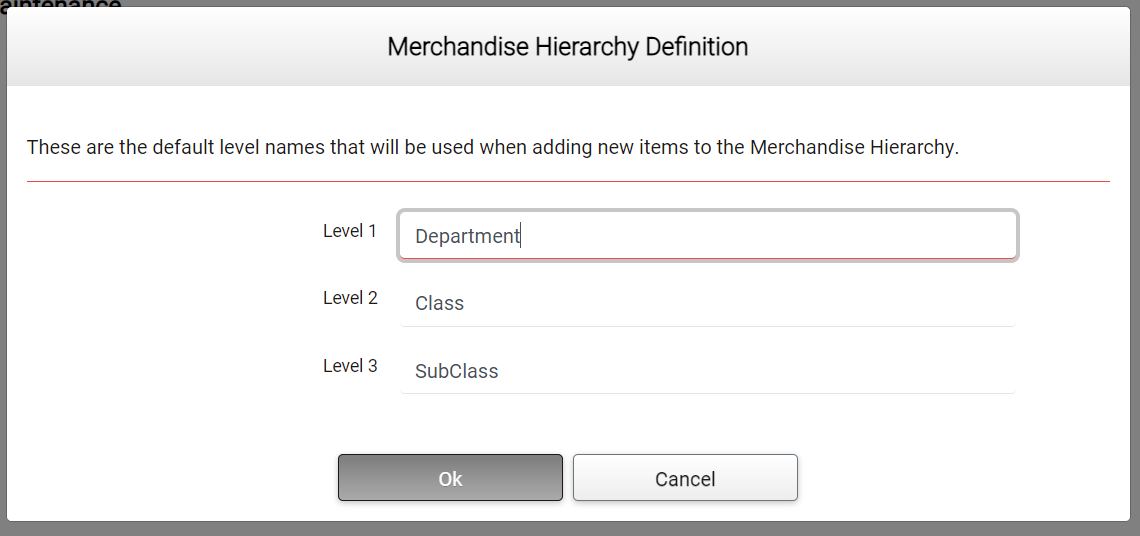
The Levels function is used to set the default names of the three MH levels for use when adding new nodes at any level.
- Click the Levels button, the following dialog appears:
Screenshot of the Merchandise Hierarchy Maintenance application.
-
Edit the level names as desired.
-
Click Cancel to cancel the name change (and then confirm).
-
Click Ok to change the default level names to the ones just provided.
-
To test the name changes, add a Level 1, Level 2, or Level 3 node in the hierarchy.
-
You should see the updated names when adding the new nodes.
Add
The Add function is used to add new nodes to the Merchandise Hierarchy.
-
Select a node in the Merchandise Hierarchy to act as a “parent” by clicking on the node.
-
Selecting the Merchandise Hierarchy root will add a Level 1 node plus Level 2 and Level 3 “children”.
-
Click the Add button to add a new node.
-
The node will be created with the default name and values (possibly as modified by the Levels function).
-
New nodes are added to the bottom of the list for the parent node.
-
After the add is complete, any new nodes must be edited to customize them.
Edit
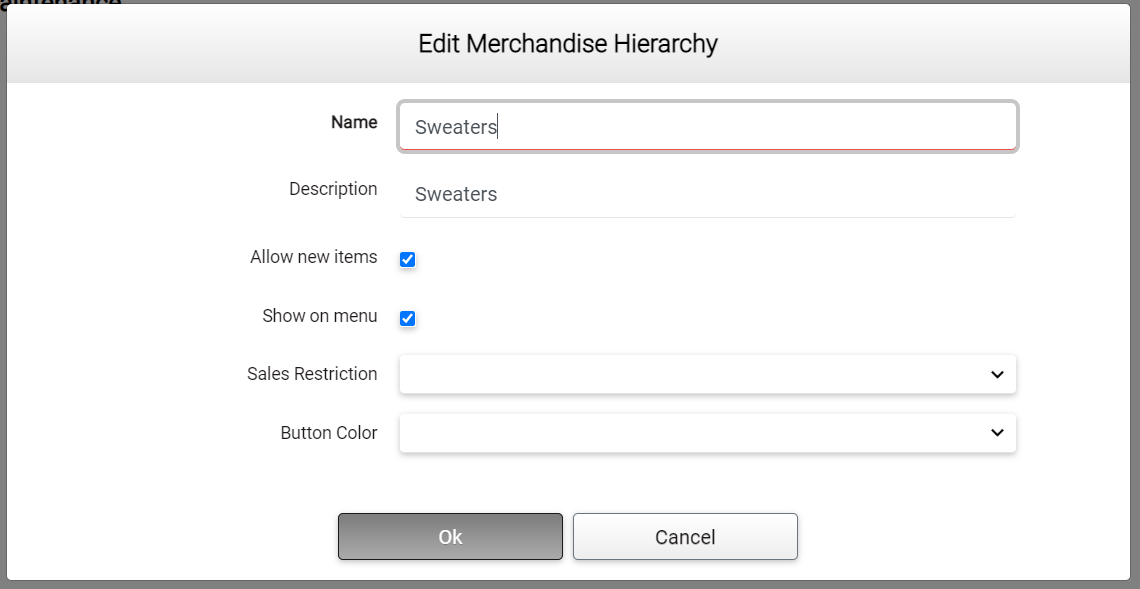
The Edit function is used to modify the values of a node in the Merchandise Hierarchy.
-
Select a node in the Merchandise Hierarchy to modify by clicking on the node and then click Edit.
-
For Level 1 (Department) nodes, the following dialog appears, the Chart of Account fields are required.

Screenshot of the Merchandise Hierarchy Maintenance application.
- For Level 2 (Class) and Level 3 (Subclass) nodes, the following dialog appears:
Screenshot of the Merchandise Hierarchy Maintenance application.
-
Set the fields as desired.
-
Click Ok to save the changes.
-
Click Cancel (and confirm) to discard the changes.
Net Sales Chart of Account (Department-level Only)
The Net Sales Chart of Account selection determines the COA to which net sales are assigned. This is a required field, the default is Sales. Current choices are here:

Screenshot of the Merchandise Hierarchy Maintenance application.
Net Discounts Chart of Account (Department-level Only)
The Net Discounts Chart of Account selection determines the COA to which net discounts are assigned. This is a required field, the default is Sales Discounts Given. Current choices are here:
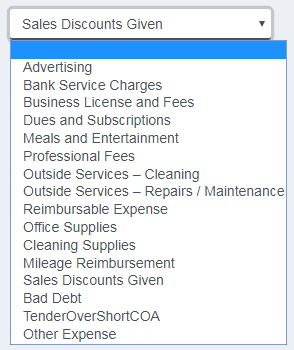
Screenshot of the Merchandise Hierarchy Maintenance application.
Sales Restriction
The Sales Restriction drop-list lets the operator select a sales restriction for the MH level being edited. A blank selection for the Sales Restriction setting indicates no sales restrictions are active. At the present time this is not implemented. The restriction choices are here, blank indicates no sales restrictions:

Screenshot of the Merchandise Hierarchy Maintenance application.
Button Color
The Button Color drop-list lets the operator select a color to be used for button-based item selection menus. At the present time, this is not implemented. The button color selections are here, blank indicates no button color:
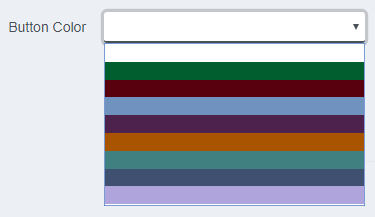
Screenshot of the Merchandise Hierarchy Maintenance application.
Delete / Undelete
The Delete and Undelete functions are used to delete and restore nodes in the hierarchy.
-
Highlight the node you with to remove and click the Delete button.
-
Alternately, highlight the node you wish to remove, right-click and select Remove.
-
If the user changes their mind, they can use the Undelete function to restore the item.
-
Click Save to make the deletion permanent.
Save
-
Click the Save button to save any changes made to the Merchandise Hierarchy by this application.
-
A dialog appears to let the user know the changes have been saved.

Screenshot of the Merchandise Hierarchy Maintenance application.
- Click OK to dismiss the confirmation dialog.
Exit
-
Click the Exit button to leave Merchandise Hierarchy Maintenance and return to the menu.
-
If there were any pending (unsaved) changes, the following dialog appears:
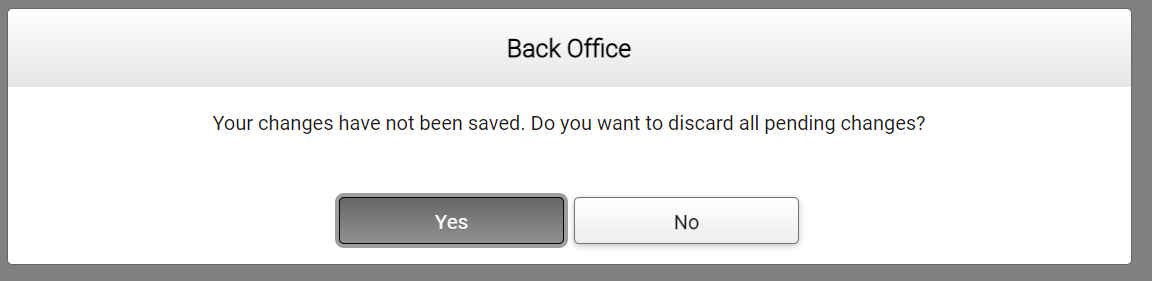
Screenshot of the Merchandise Hierarchy Maintenance application.
-
Click Yes to discard the changes and return to the menu.
-
Click No to remain in the application to save or update the changes.
Clear
The Clear function deletes the entire Merchandise Hierarchy and is intended to be used only on hierarchies that have no items defined for them. Normally if there are items defined for the MH, the Clear button will not be available.
-
Click the Clear button.
-
Click No to leave the function.
-
Click Yes to proceed with clearing the Merchandise Hierarchy.
-
When the deletion is complete, the following screen appears:
Screenshot of the Merchandise Hierarchy Maintenance application.
-
Select the Merchandise Hierarchy type by clicking one of the radio buttons on the left.
-
When the type is selected, a new and empty Merchandise Hierarchy will be created.
-
Use Add and Edit to populate the hierarchy with the desired Department/Class/Subclass entries.