Tax Maintenance
Initial (Main Search) Screen
-
From the Tax Management / Reports Menu, select Tax Maintenance
-
An initial search screen (like the one shown below) should appear
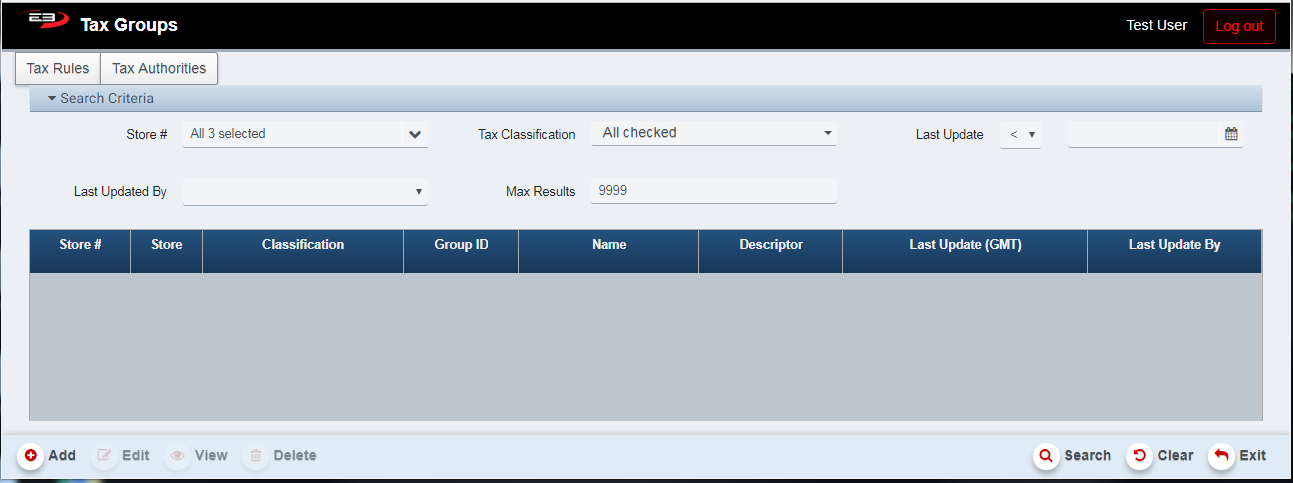
Screenshot of the Tax Maintenance application.
- Select the (1..N) stores you have visibility to. NOTE: It is typically easier to manage and view the result set of a single store; i.e., it is recommended to select a single store at a time.
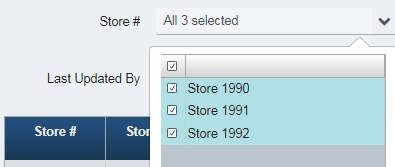
Screenshot of the Tax Maintenance application.
- Click Search, the search results will look like the following.
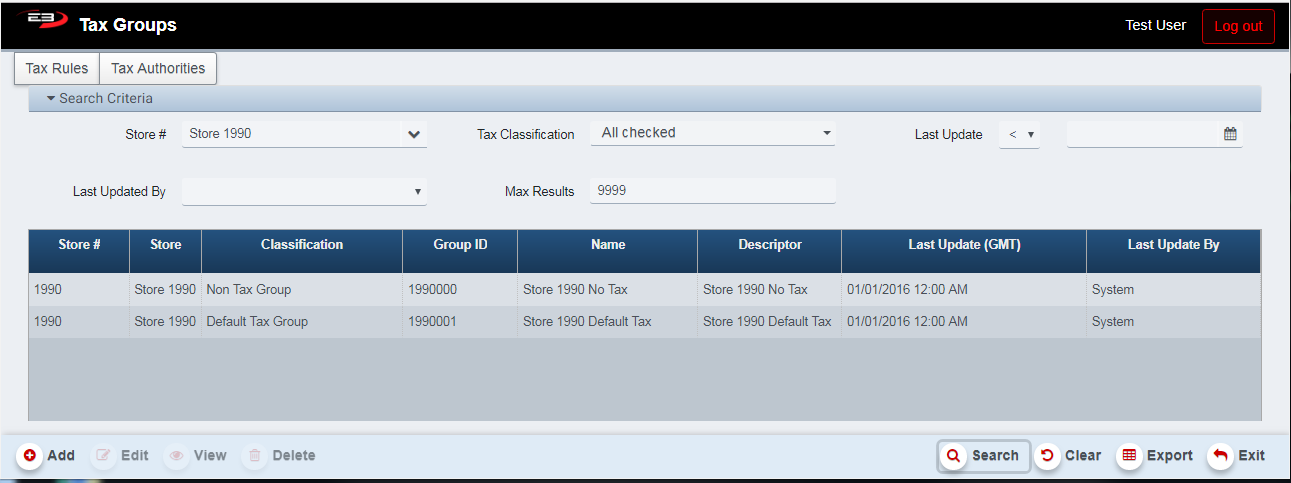
Screenshot of the Tax Maintenance application.
-
The search result set should display. By default, the “Non Tax Group” for the store (in our example, Store 1990) should display at a minimum.
-
Every store should have a “Non Tax Group” already defined. The user may VIEW this tax group, but should not be permitted to edit this default Tax Group. A Non Tax Group looks like this.
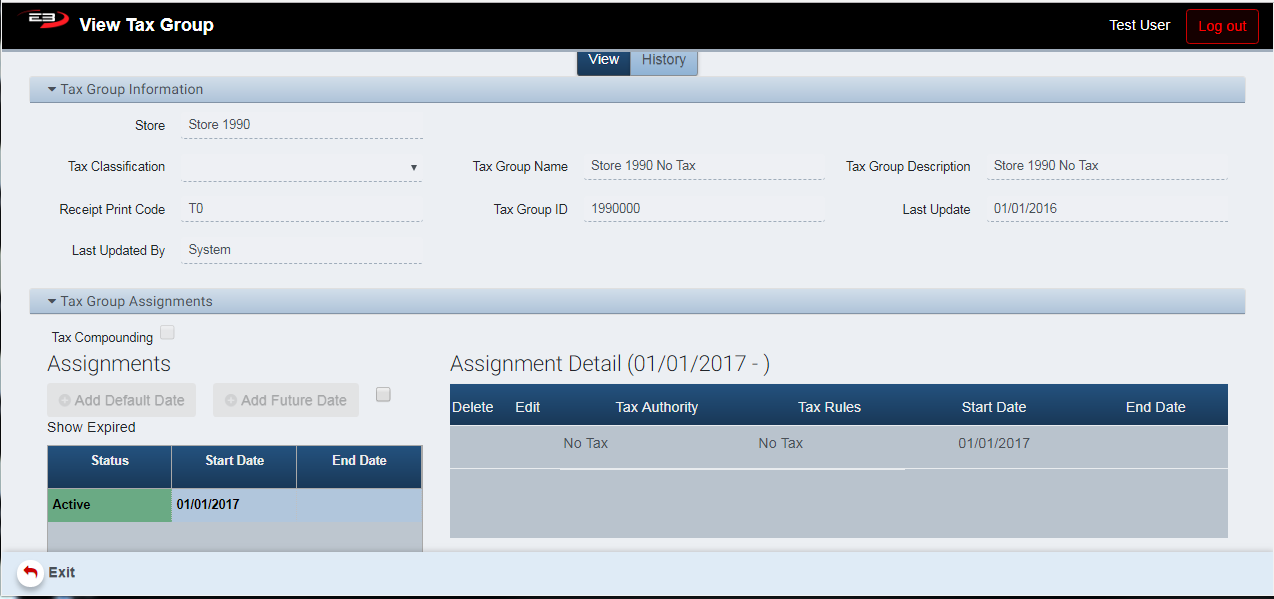
Screenshot of the Tax Maintenance application.
Add a Tax Group
To Add a Tax Group (Note: The user must have the resource permission to Add a Tax Group)
- Select the Add icon
Screenshot of the Tax Maintenance application.
-
If the Add icon is not enabled or visible, the current user does NOT have the security permission to perform this function.
-
A screen (like the one shown below) should appear:
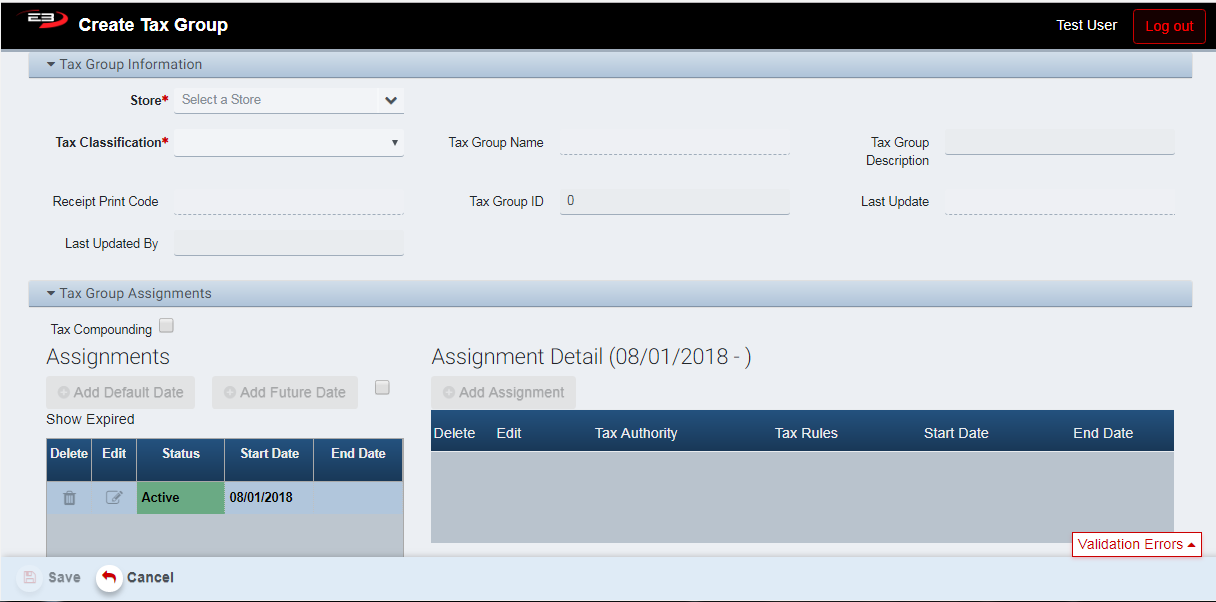
Screenshot of the Tax Maintenance application.
- Select the store to assign the new Tax Group to (for example, Store 1992)
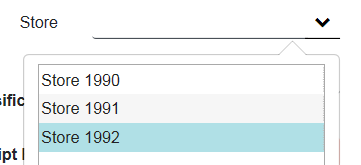
Screenshot of the Tax Maintenance application.
-
Select the Tax Classification
-
Other than the “No Tax Group”, most retailers will have 1..N (where N is typically 3 or less) Tax Classfication Groups.
-
The Default (or most used) Tax Group
-
The Secondary (2^nd^ most used) Tax Group
-
etc
-
-
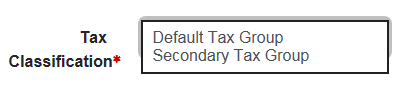
Screenshot of the Tax Maintenance application.
-
Selecting a Tax Classification will default certain fields. In the example below, the Default Tax Group classification was selected by the user:
-
The Tax Group Name is defaulted (but can be changed)
-
The Receipt Print Code is defaulted (but can be changed)
- The Receipt Print Code is typically printed on the POS Receipt when an Item (which is assigned to the given Tax Group) is sold. The user can change the Receipt Print Code, but it must be unique across the various Tax Groups (for a given store).
-
-
Every Tax Group needs at least one active Tax Assignment (ie, Tax Rule and Tax Authority).
Add a Tax Assignment (Rule / Authority) to a Tax Group
To add a Tax Assignment, select the “Add Assignement” icon.
Screenshot of the Tax Maintenance application.
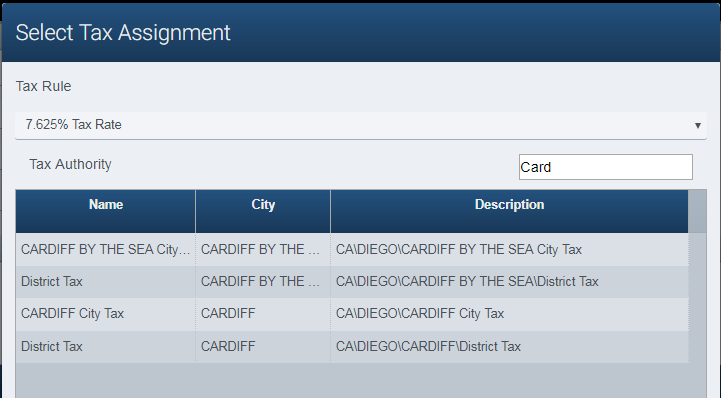
The Select Tax Assignment dialog appears.
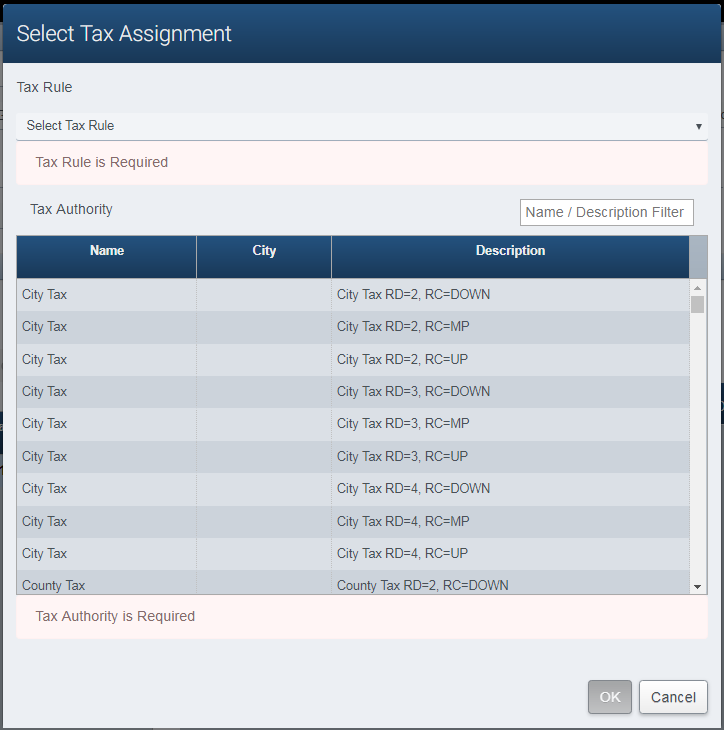
Screenshot of the Tax Maintenance application.
Select a Tax Rule
The BackOffice system is seeded with default Tax Rules. If you don’t find the Tax Rule that meets your requirements, please contact the HelpDesk and a new Tax Rule will be created.
Certain deployments give the store managers (store owners) the capability to add their own tax rules (restricted to specific retail store numbers). In most cases, it is preferred that adding new tax rules be coordinated with the HelpDesk.
Click the down-arrow on the right side of the Select Tax Rule control, this displays the list of available tax rules.
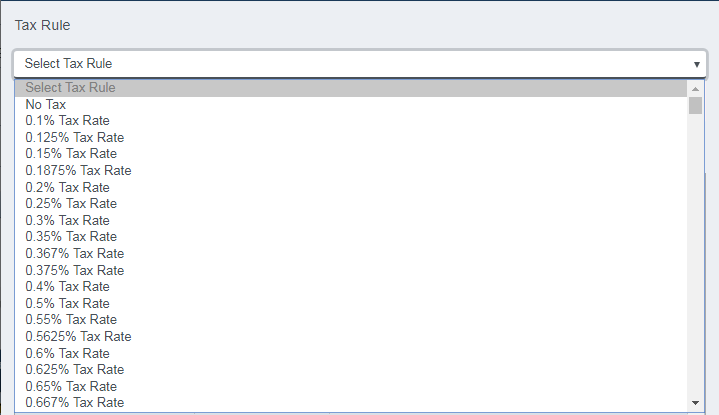
Screenshot of the Tax Maintenance application.
Scroll down the list and click on the Tax Rule you wish to select, the selected tax rule appears in the field and the Select Tax Rule control closes.
Default Tax Rule Seeding: (DISCLAIMER)
A majority of the default tax rules seeded in the system are defaulted to calculate tax at the “Transaction Level” and to calculate tax on the “Net” (ie, discounted) Amount. If the default settings do not meet your tax requirements, contact the HelpDesk to create a new rule, or create a custom one for your store (if you have the security permission to add a new tax rule).
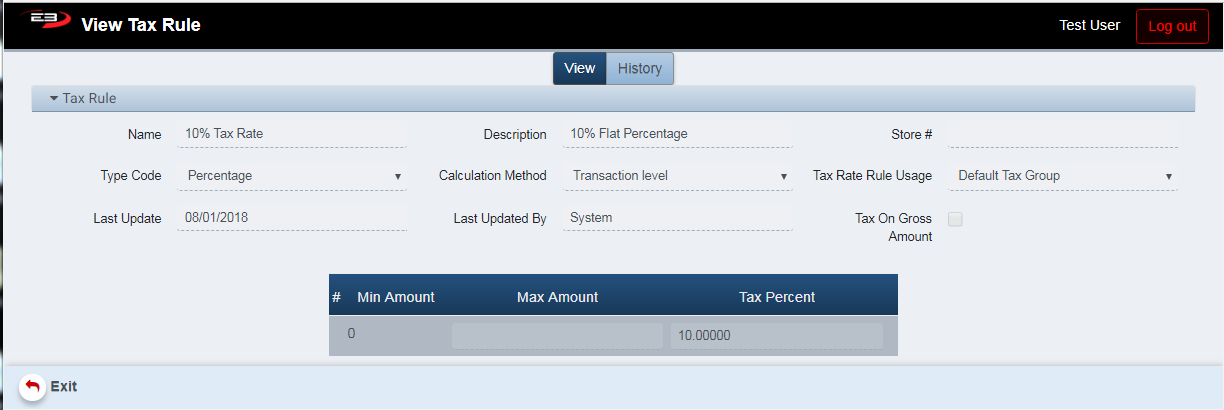
Screenshot of the Tax Maintenance application.
**Always VIEW the Tax Rule you are using in your Tax Assignments to verify the correct setup / configuration!!! **
Select a Tax Authority
The BackOffice system is seeded with many default Tax Authorities. A majority of the default system Tax Authorities have the Rounding Digits set to 4, and the Rounding Code set to “Mid-Point Rounding”. If your local Tax Authority requires (or your Tax Account recommends) different values, please contact the HelpDesk and a specific (labelled) Tax Authority with “RD=X” or “RC=Up” text in the tax authority description will be created on demand.
As the Store Manager (or Store Owner), you are responsible for tax settings and final tax calculations. Since default Tax Authorites may be shared among stores, you are NOT permitted to edit system default Tax Authorities, but the HelpDesk will ensure that custom tax authorities (or new system defaults) are setup per your specific requests.
- Certain deployments give the store managers (store owners) the capability to add their own tax authorities (resctricted to specific retail store numbers). In most cases, it is preferred that this action (adding new tax authorities) be coordinated with the HelpDesk.
Always VIEW the Tax Authority you are using in your Tax Assignments to verify the correct setup / configuration!!!
Default Tax Authority Seeding:
As noted above, the BackOffice system is seeding with many default Tax Authorities based on Cities throughout the USA.
-
State
-
There will be an entry for each state:
- “CA State Tax”
-
-
County
-
There will be an entry for most counties:
-
“CARiverside County Tax”
-
“CASan Diego County Tax”
-
County Name
-
-
-
City
-
There will be an entry for most cities / towns:
-
“CASan DiegoSolana Beach City Tax”
-
“CASan DiegoSan Diego City Tax”
-
City Name
-
-
-
Special
-
This generic authority may be used for special district, park, local tax assessments
-
There will be an entry for most cities / towns:
-
“CASan DiegoSolana BeachSpecial Tax”
-
“CASan DiegoSan DiegoSpecial Tax”
-
Special Tax
-
-
Note
- The search list of tax authorities is restricted to tax authority definitions associated with the specific Retail Store Number’s definition defined in the Retail Store Locations database.
Tax Authority Description Search
To search for for a specific Tax Authority (County, City, other) entry for the given store’s state or province, use the Search Filter to narrow down the result set. In the example below, the user has entered the text to limit the result set to the authorities that have the text “Card” in the tax authority description.
Screenshot of the Tax Maintenance application.
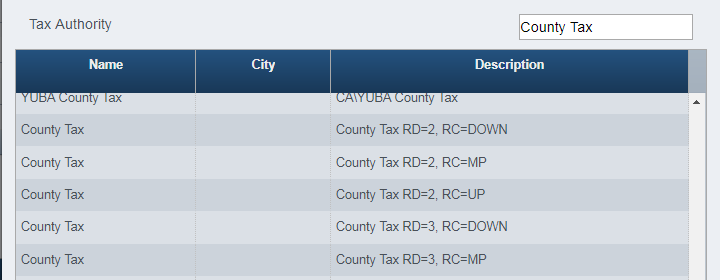
Generic (Misc) Pre-Defined Tax Authorities
In an emergency, if the appropriate tax authority cannot be found in the system, the user can search for the following generic Tax Authorities which have specific rounding digits and rounding codes defined. In the search by description text box, search for the text “State Tax”, “County Tax”, “City Tax”, or “District Tax”.
Screenshot of the Tax Maintenance application.
There are generic 9 Tax Authorites set up State, County, City, and District with various default tax defaults:
-
RD (Round Digit) = 2 RC (Rounding Code)= DOWN
-
RD = 2 RC = MP (Mid Point / Half Penny)
-
RD = 2 RC = UP
-
RD = 3 RC = DOWN
-
RD = 3 RC = MP
-
RD = 3 RC = UP
-
RD = 4 RC = DOWN
-
RD = 4 RC = MP
-
RD = 4 RC = UP
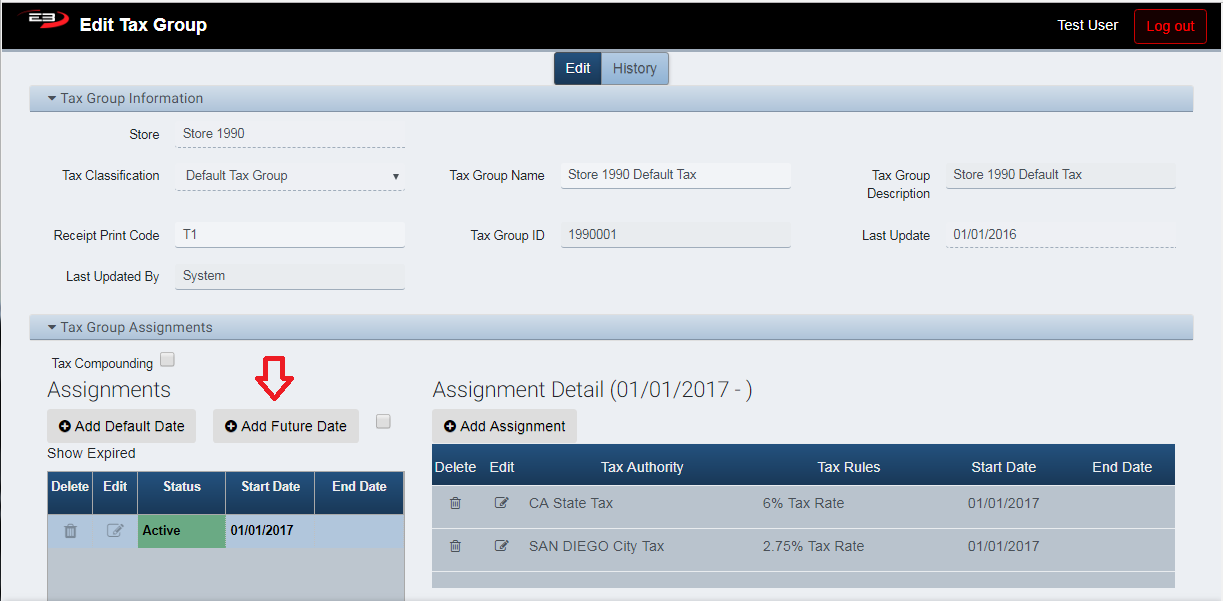
Sample Tax Assignment
The following is only an example of a Tax Group setup with two tax assignments (State Authority and City Authority).

Screenshot of the Tax Maintenance application.
The user may have decided to setup the tax group with just on tax authority (SAN DIEGO City Tax) with a tax rule of 8.75%. Store Managers (or Store Owners) should work with their Tax Preparers (or Corporate Office) to confirm the appropriate tax assignments.
Sample Tax Holiday Setup
To setup different tax rates for a specific date range (for example, a state tax free holiday), select the “Add Future Date” icon.
Screenshot of the Tax Maintenance application.
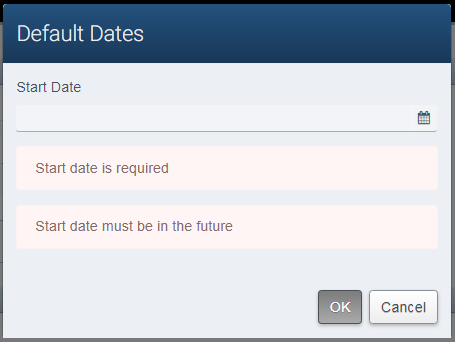
Select the Future Dates.
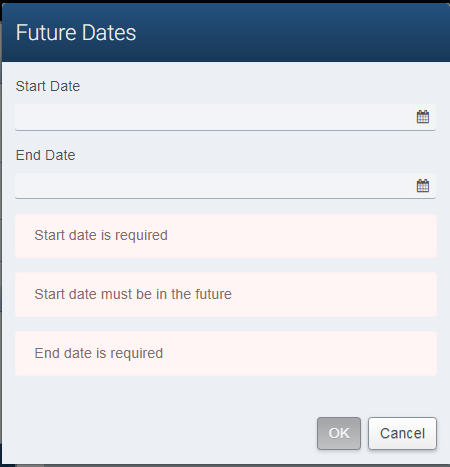
Screenshot of the Tax Maintenance application.
After entering the Future dates, you will be prompted to enter the future (temporary) tax assignments. In the example below, the future tax assignment has been configured for NO TAX.
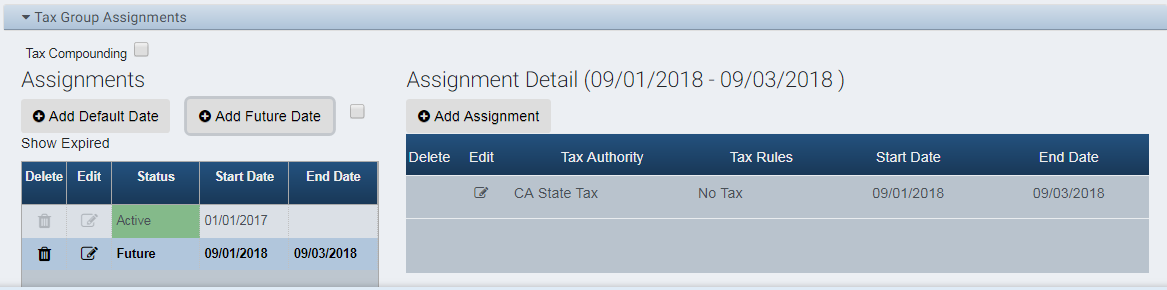
Screenshot of the Tax Maintenance application.
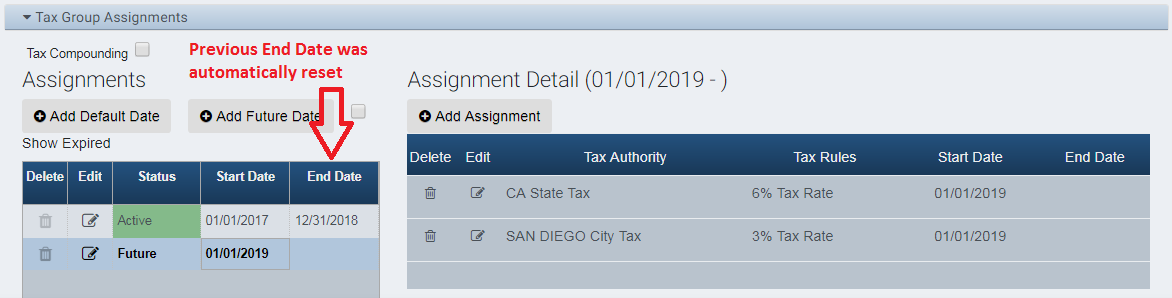
Preparing Future (Permanent) Tax Rate Changes
To setup different tax rates and/or authorities for a pending sales tax change, select the “Add Default Date” icon.
Screenshot of the Tax Maintenance application.
Note
- Defining a new (additional) default date will AUTOMATICALLY reset (define) the end date to the existing default tax assignment dates.
After entering the new default start date, the user can enter the new tax assignments.
In the example below, the “city tax” for San Diego was changed to 3% (from 2.75%) effective 01/01/2019, and the previous default tax setup’s end date was automatically set to 12/31/2018.
Screenshot of the Tax Maintenance application.
Tax Compounding
Tax Compounding (aka Tax on Tax) is used very infrequently in the USA. If you intend to use this feature, please verify the configuration and setup with your Tax Preparer or CPA.
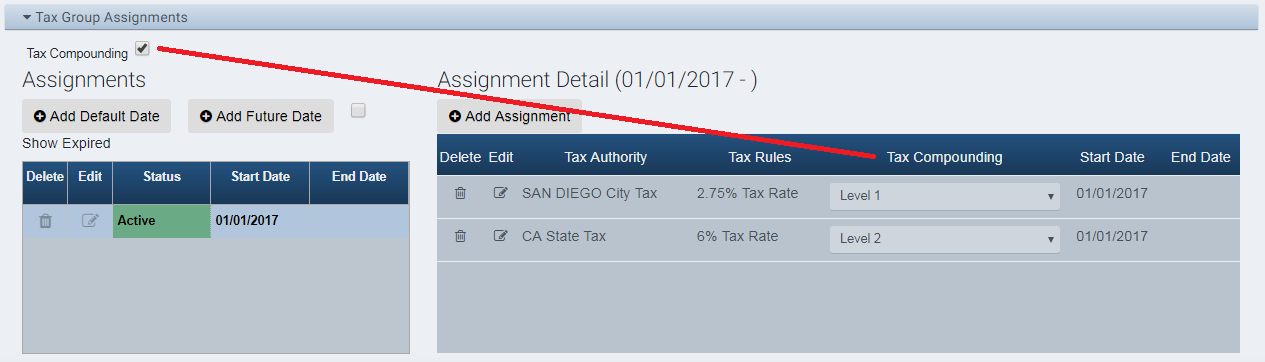
Screenshot of the Tax Maintenance application.
In the above example, the CA State Tax will be calculated on the transaction subtotal plus the San Diego City Tax.
Verification / Audit Tax Calculations (DISCLAIMER)
As the Store Manager (or Store Owner), you are responsible for tax settings and final tax calculations.
Upon completion of the Tax Changes, give the system reasonable time for the data to move from the central enterprise (Cloud) database to the store server (or primary POS Terminal).
From the POS Application, use Reload Options from the Manager Function’s menu to refresh the POS Application’s memory cache.
Ring various transactions with fixed line item amounts and verify that the tax calculations are accurate. Remember to also perform return transactions and mixed (Sale + Return) transactions. If you have any discrepancies or concerns, contact the HelpDesk immediately!