Promo Sales History
Initial (Main Search) Screen
-
From the Reports > Sales Analysis Reports menu, select Promotional Sales Report.
-
An initial search screen (like the one shown below) should appear.
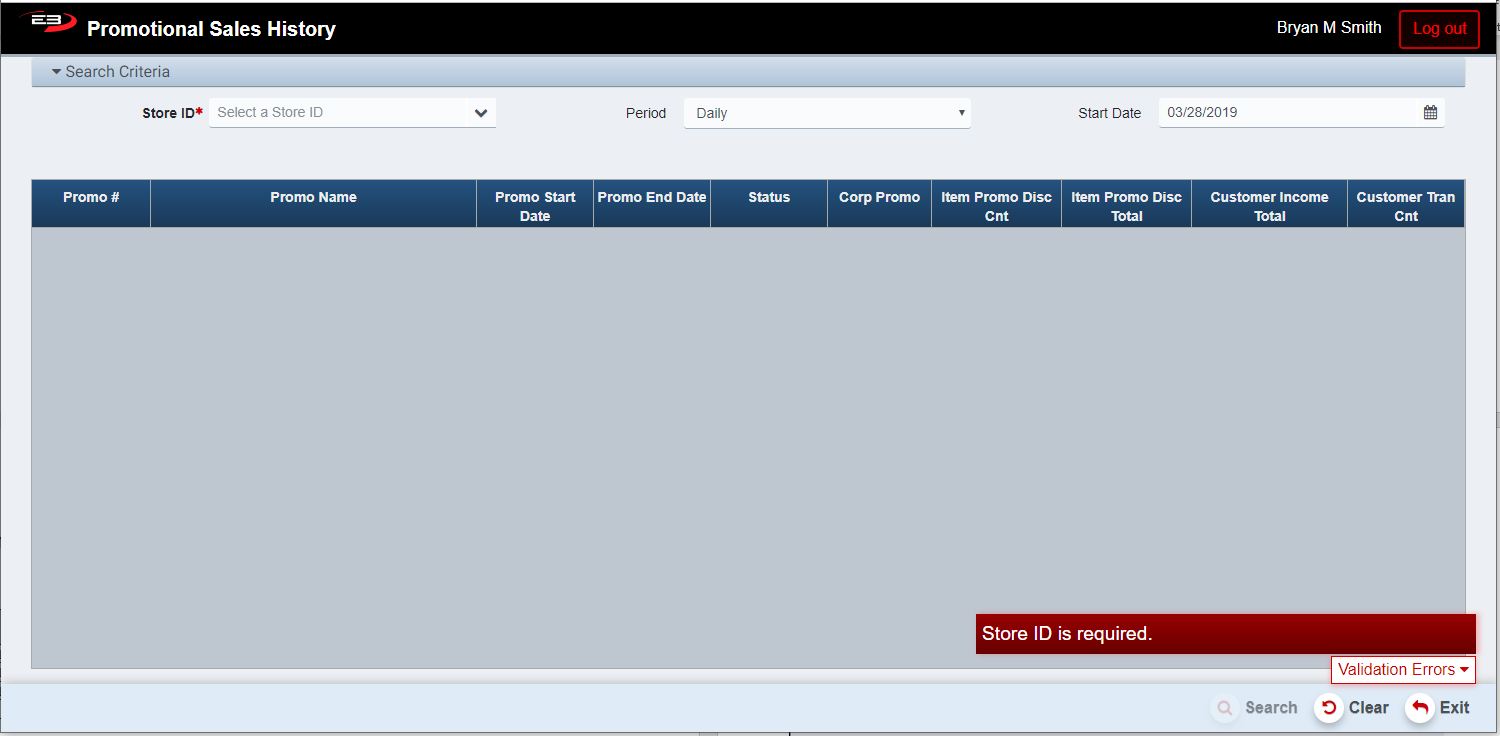
Screenshot of the Promo Sales History application.
-
Click Clear to reset the search criteria back to their default values.
-
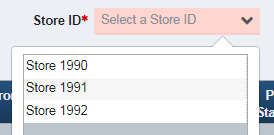
The user must select a store from their store visibility list.
-
If only one store is visible to the user, that store is selected by default.
Screenshot of the Promo Sales History application.
-
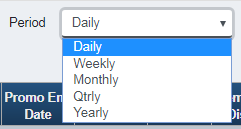
The user may select a Period and Start Date to filter the results.
-
Periods are: Daily, Weekly, Monthly, Qtrly, and Yearly.
-
The Start Date has a default value for each of the period values and may also be manually set.
Screenshot of the Promo Sales History application.
-
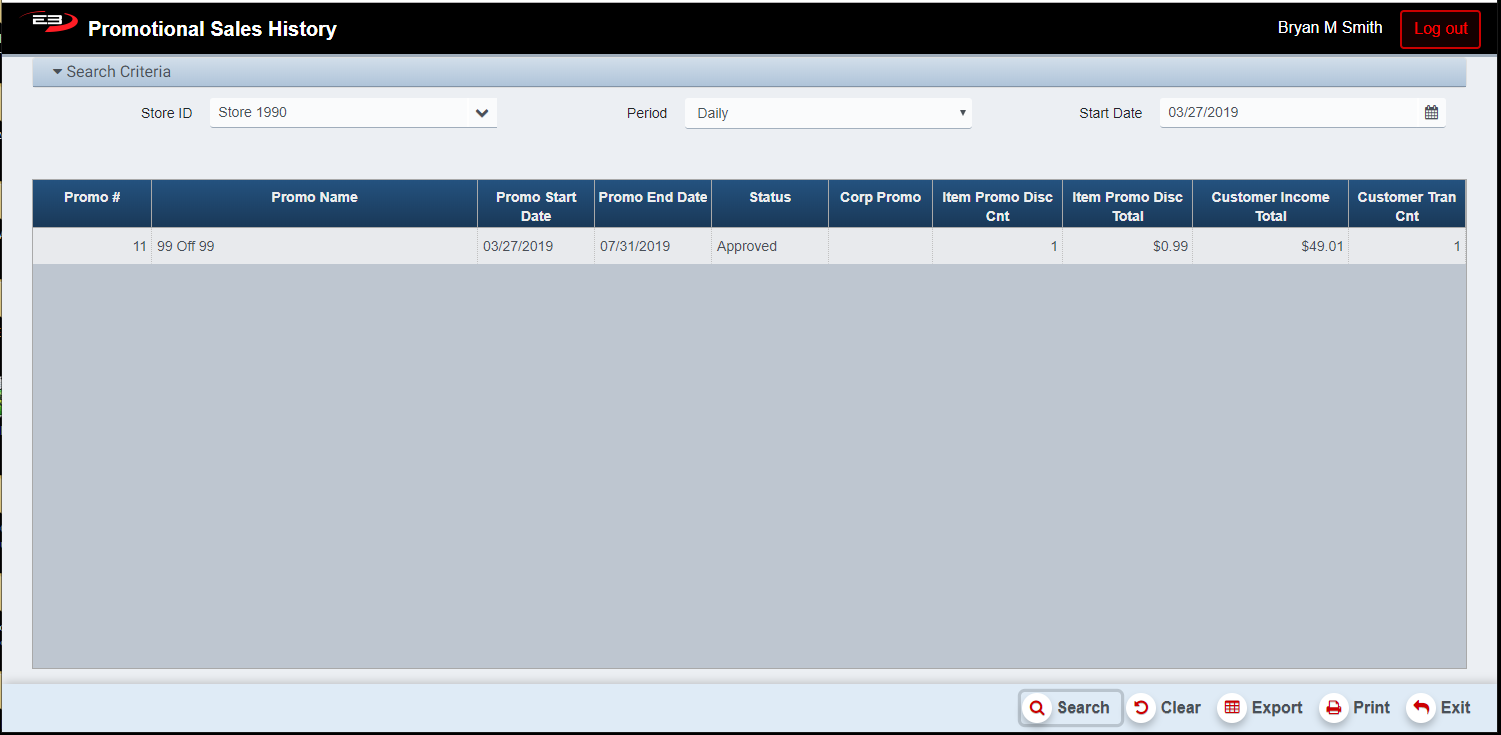
Click Search, the results will display like the following.
-
If there are results from the search, the Export and Print buttons are made visible and enabled.
Screenshot of the Promo Sales History application.
Results Grid
The results grid always contains the following columns, each promotion used gets a row in the results. There is a summary row for all promotions combined.
-
Promo # - this is the internal ID for the promotion.
-
Promo Name - this is the name of the promotion.
-
Promo Start Date - this is the start date for the promotion.
-
Promo End Date - this is the end date of the promotion.
-
Status - this is the current status of the promotion, highlighted in Orange if the promotion has expired.
-
Corp Promo - this is a flag indicating that this is a corporate promotion.
-
Item Promo Disc Count - this is the count of items whose price was changed by this promotion.
-
Item Promo Disc Total - this is the total amount for items whose price was changed by this promotion.
-
Customer Income Total - this is the total income for sales involving this promotion.
-
Customer Tran Count - this is the total transaction count for sales involving this promotion.
The summary row for all promotions combined has the following columns:
-
Line Item Promo Sales Disc Count - this is the total number of items that were discounted.
-
Line Item Promo Sales Disc Total - this is the total discount amount for items that were discounted.
-
Customer Income Total - this is the total income for all sales involving promotions.
-
Customer Tran Count - this is the total transaction count for all sales involving promotions.
Other Commands
Export
The Export function allows the user to save the report as a comma-separated values (CSV) file for use in Excel. Once you have a result set that’s filtered as desired, click the Export button. The file is saved as Promotions Sales_yyyy-m-d.csv in the default location, typically the Downloads folder for the user.
The Print function allows the user to save the report as an Acrobat PDF file for viewing/printing in Adobe Acrobat Reader. Once you have a result set that’s filtered as desired, click the Print button. The file is saved as PromotionalSalesHistory.pdf in the default location, typically the Downloads folder for the user.